Table of Contents
How To Allocate More RAM To Minecraft & Minecraft Server
How To Allocate More RAM To Minecraft & Minecraft Server.Minecraft may appear easy, graphical, but it’s quite intense. No surprise that the game has a lot in the history of many game types, regular updates and new modifications and expansion packs.
If your game slows for only one second or a complete stroke, it may be a restricted amount of RAM. Players are able to resolve this problem by downgrade or increase the RAM. For the unseen, players appear to like the second way more.
Here’s how to allocate more RAM to Minecraft and the server for better gameplay
Reminders before allocating more RAM
Players need to adjust the settings of the Minecraft Launcher software in order to change the RAM amount Minecraft may use. A software that a player uses to launch the game is the launch application.
Indeed, depending on what modifications you have loaded there are numerous launcher applications you may use. Now we’re going to walk over three of the most famous, starting with nearly everyone’s most typical launcher.
At least 2GB of the RAM assigned to Minecraft should be available for players. If you want to utilise several modifications, consider up to 4 or 6GB.
Nevertheless, take careful not to make the RAM larger than what the machine has. Check three Minecraft RAM techniques now. Now.
How to allocate more RAM to Minecraft
Method 1: Default ‘Minecraft’ launcher
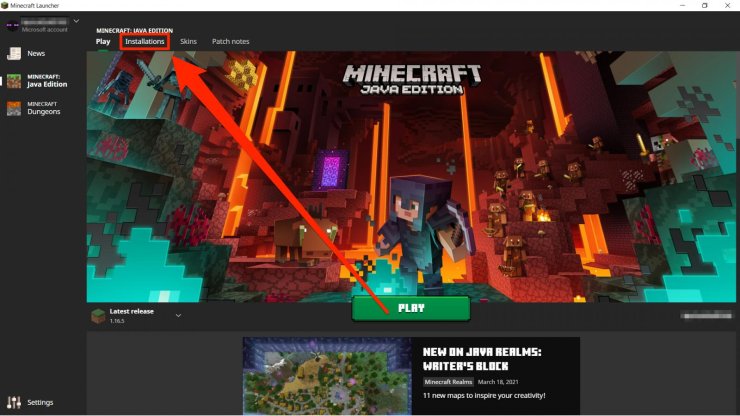
You surely remember his default start programme called Minecraft Launcher when you’re a Minecraft player. Following are the instructions for Minecraft to use this software for additional RAM:
- Choose the “Installations” tab on the top after opening Minecraft Launcher.
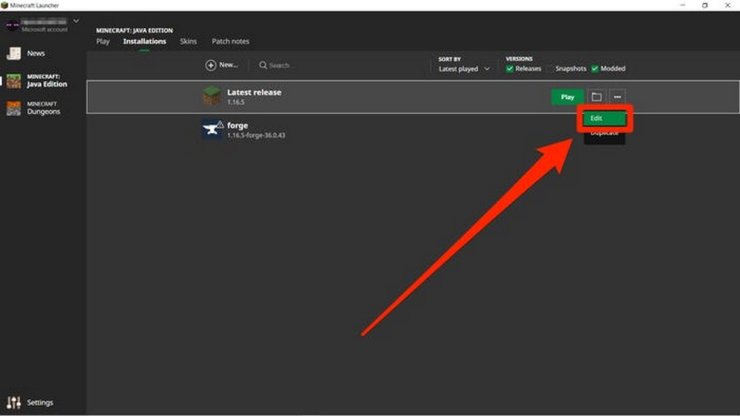
- Navigate over the Minecraft version you aspire to allot RAM to. Then, hit the three dots on the right side and choose “Edit”.
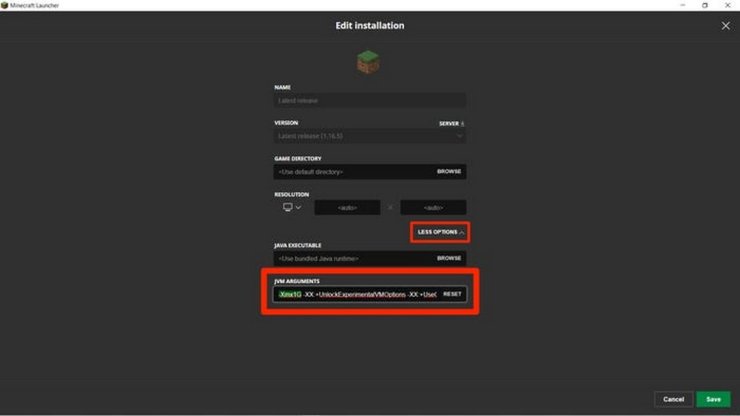
- To disclose further two fields, select “More Options” in the bottom right corner of the screen.
- You can notice a bit of code at the beginning of the field “JVM Arguments” like “-Xmx2G.” The 2G represents the amount of gigabytes now available in the Minecraft.
Change this number to the RAM number you wish to assign. The rest of the content must be kept intact.
- Hit “Save” to finish your changes.
Method 2: CurseForge ‘Minecraft’ launcher
CurseForge is a popular launcher for Minecraft and provides the second solution to the issue of how Minecraft may be given additional RAM.
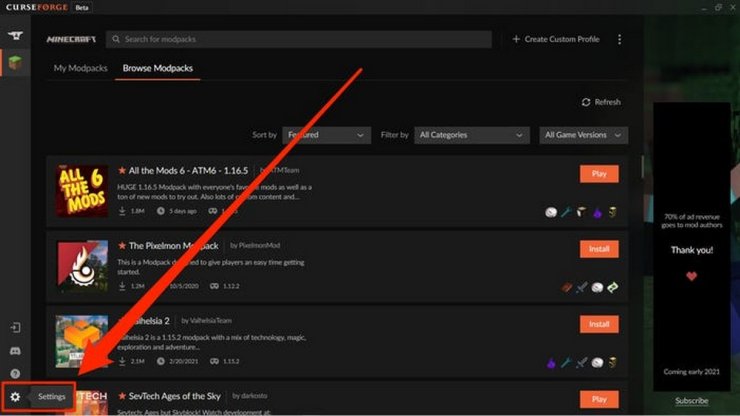
- After booting up CurseForge, click the gear button on the screen’s lower left angle to access “Settings”.
- In the column on the left side of the settings screen you will find a section named “Game Specific.” Select “Minecraft” Choose it.
- Download “Java Settings” to “Memory assigned” and a slider is available. Just drag from here and drop the orange ball on the slider to your preferred RAM allocation. Every modification is automatically stored.
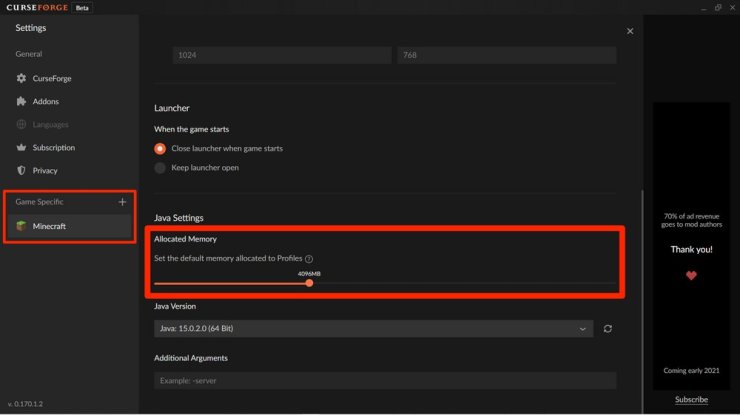
Tip: CurseForge does not measure RAM usage in GB but in MB instead. Remember that in this case, 1024MB is 1GB.
Method 3: ATLauncher ‘Minecraft’ launcher
ATLauncher is the last but not least technique to provide Minecraft with additional RAM.
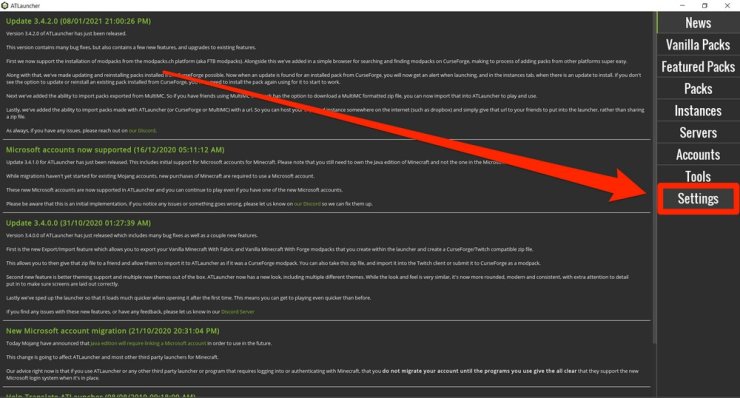
- Launch the ATLauncher app, then click “Settings” which is on the right panel.
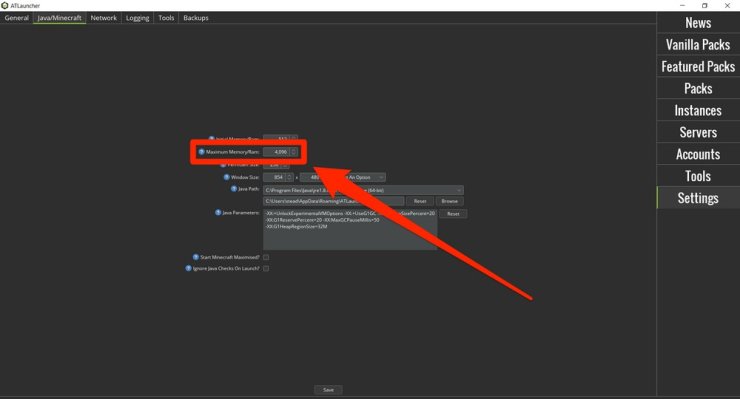
- At the top of the settings page, the players will be seeing numerous tabs. Simply select the tab “Java/Minecraft.”
- A list of changes will now be available. The second is “Maximum Memory/RAM.” This shows the number players would want to have the new RAM. It’s in megabytes as well.
- Make sure you “save” to confirm these changes after making changes to the Cap RAM.
Also Read: Battlegrounds Mobile India PUBG Hack Script Season 19 1.4.0
How to allocate more RAM to a Minecraft server
In the meanwhile, users running their own server in Minecraft would also demand additional RAM. If you don’t have a lot of RAM, you cannot load or maintain the server gamers that are playing on it. In addition, all game changes will fail.
Note that these procedures are for Windows 10 PC servers — the technique of this is different on Mac and Linux systems. Therefore do not hesitate and also see how additional RAM is assigned to a server of Minecraft:
- Launch the folder where is home to your Minecraft server files.
- Then, right-click on the black space in the folder. Choose “New” & “Text Document”. The name can be left unidentified for now.
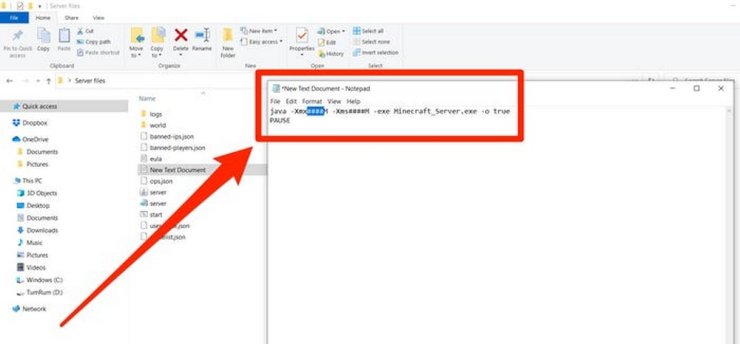
- Open the document and paste this code in:
java -Xmx####M -Xms####M -exe Minecraft_Server.exe -o true
PAUSE
Enter the RAM amount you want to allocate in the “####”. One should write it in megabytes. For example, if you aspire to allocate 4GB, you will insert “4096”, making it:
java –Xmx4096M –Xms4096M -exe Minecraft_Server.exe -o true
PAUSE
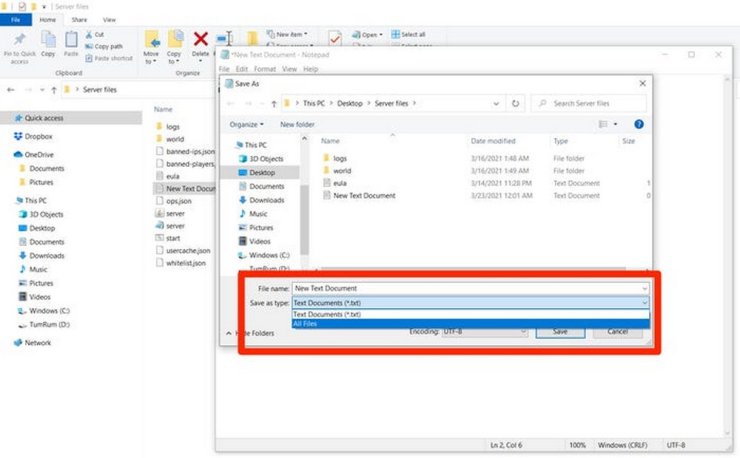
- Hit “File” and “Save As…” respectively. Now in the menu that just opens, change “Save as type” into “All Files”. Remember to save it.
- Boot up the saved document that is visible in your folder, change its name to “file server launcher.bat” (with no quotes).
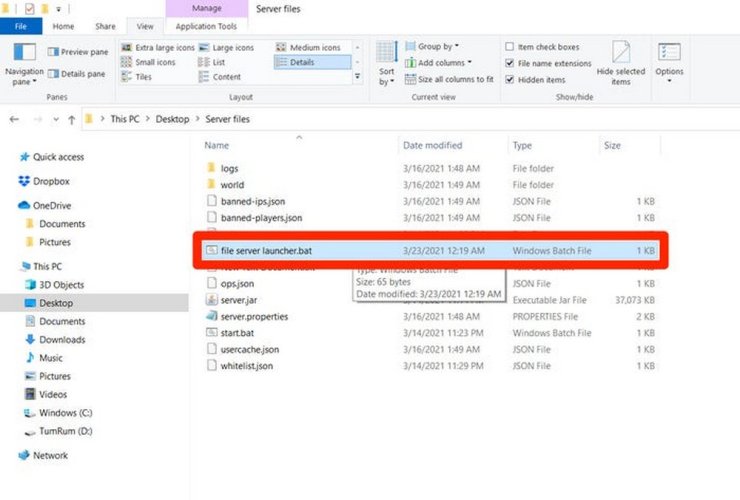
- The thing that was a text document has become the new launcher for your Minecraft server. Click double on the new .bat file in order to run the server with the new RAM amount.