how to take a screenshot on windows,how to take a screenshot on windows 10,how to take a screenshot on windows 7,how to take a screenshot on computer
It’s not especially exciting to take a screenshot but still it’s a very useful ability to have it. Screenshots may be useful in order to better demonstrate a bug that is required for record-keeping or requested by the technologist help.
1.How to screenshot on mac MacBook’s|2021
2.How to take screenshot in laptop windows 10|2021
3.How to take a screenshot on PC 2021
4.How to take a screenshot on iphone 2021
Table of Contents
Step 1: Capture the image

Here’s a breakdown of the six screen-capture commands:
- Print Screen (PrtScn): Captures the entire screen. If you have more than one display, this function captures everything shown across all connected displays as a single image. By default, this method does not save your image as a file but merely sends the captured image to the clipboard.
- Alt + Print Screen: Captures a single window. Be sure to highlight the target window first, such as a document or browser, before pressing these two keys (or three on certain laptops). By default, this method does not save your image as a file but just sends the captured image to the clipboard.
- Win + Print Screen: Captures the entire screen. The difference here is that Windows saves the image as a file. By default, it’s sent to C:Users<user name>Pictures>Screenshots on your PC.
- Win + Shift + S: Capture a screenshot using the built-in Snip & Sketch tool. The screen dims and provides four choices on a small toolbar (not including the exit icon): Rectangular Snip, Freeform Snip, Window Snip, and Fullscreen Snip. This tool does not save captures as an image but merely sends them to the clipboard. We expand on this later in the guide.
- Win + G: Opens the Xbox Game Bar. Click the Capture button and then the Camera icon, and this tool will save an image to C:Users<user name>Videos>Captures by default.
- Win + Alt + Print Screen: Captures only the active window. This command saves an image to C:Users<user name>Videos>Captures by default.
In some instances, the panel flickers or fails to show that the screenshot was taken on Windows. If it doesn’t, open File Explorer to see if Windows saves your image at its default locations
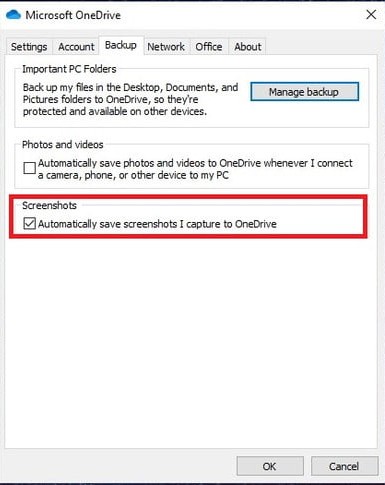
You can save screenshots from each computer to the cloud when you use OneDrive. The default screenshots are not saved. Instead, the cloud icon next to the system clock must be clicked (or in the Hidden Icons menu marked with an upward-facing arrow). You will have to start opening the OneDrive app and sign up for your account if this icon doesn’t appear. Tap on the Help & Settings icon and on the pop-up menu, click “Settings.” Then, in a pop-up window, click the Backup tab and check the Screenshots box. Then click OK.
In such cases, the first two commands of print screen can be pressed to save a picture on OneDrive automatically. For these commands, you won’t see the screen flicker or dim — rather, you will get a note. If you want to view the photos on your PC, be sure to sync the Screenshots folder.
Step 2: Open Paint
You can find and display the image using the Photos app while you are using a tool that saves your screenshot locally as a file. If everything looks fine, you can pass it, e-mail it, upload it to the cloud, etc. You have three native tools available to you, however, to build a picture — particularly for PCs with more than one screen: paint, Paint 3D, and images.
Microsoft’s newer Photos software is very restricted in relation to Paint and Paint 3D. You can turn and crop pictures, modify their look ratio, add filters, adjust colour, delete a red eye, etc. However, a picture cannot be produced from scratch and pasted from the clipboard.
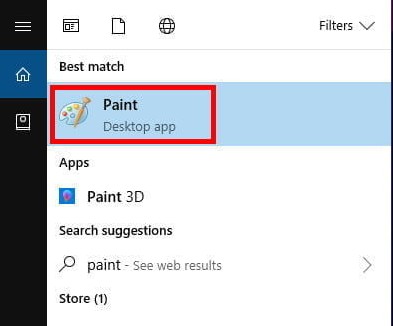
We use the old Paint software in this guide as it is well known and dependable. You can not find it in the Start menu by default. Rather, type in the search field of the taskbar “paint” and press the desktop app resultant.
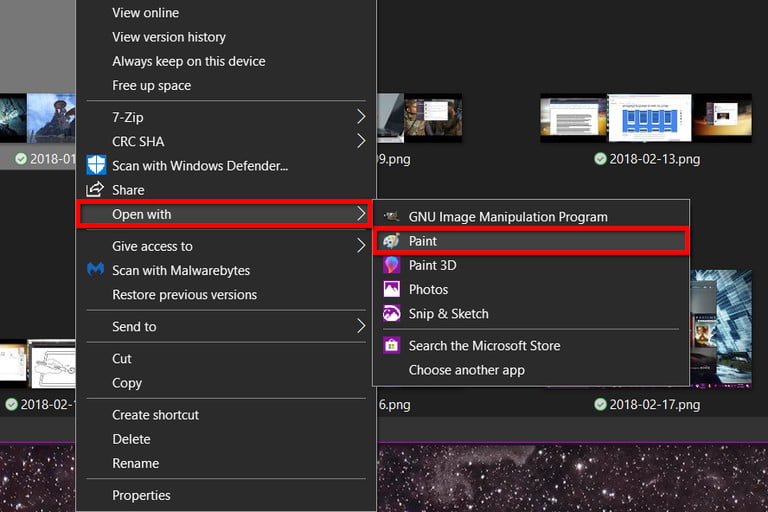
Paint can be available if you click on a picture right-click. If the pop up menu is shown, hover your mouse pointer over Open menus. As shown in a secondary menu, you can see Paint listed below.
In the directory C:WindowsSystem32, you can also find a programme â mspaint.exe â. Right-click on the file and on the popup menu, select Pin to Start.
Step 3: Paste the screenshot (clipboard only)

You’ll need this step if you used a screenshot method that sends your capture to the clipboard.
If Paint is available, press the Paste button in the top-left corner in the clipboard format. To fit the image on paint’s blank canvas you can also press Ctrl + V keys on the keyboard, which will expand as needed.
You can crop, paint, build shapes, add text and much more with your screenshot properly inserted in the paint. Click on the colourful Edit With Paint 3D Button at the right end of the toolbar if you would like to add stickers, 3D shapes, effects and more.
Step 4: Save the screenshot

When you finish editing the paint image, in the upper right corner click on the main file option. Next, in the dropdown menu, pick Save As. With the Other Formats option, this option extends by choosing four file formats – PNG, JPEG, BMP and GIF, allowing you to save your images with a TIFF or HEIC file.
Check our guide: Jpeg vs.PNG: when and why to choose one format over the other if you are not familiar with picture formats.
Any format you pick will show a pop-up window. Enter a name for your file and choose from the drop-down menu your preferred format. If you do not want to save a screenshot at the default venue, you too can choose a particular destination.
When you’re ready, click the Save button in the bottom-right corner.
And that’s it! You’re done.
Alternative: The Snipping Tool

The Snipping Tool is the perfect choice. This integrated screen shot utility works enough, but when it comes to storing a screenshot, it is not the most stable or flexible. It is a utilities, however, which enable users to identify and capture portions of their screenshot display more effectively.
Type “snipping tool” into the search field of the taskbar to begin with and pick the resulting programme. When it is available, you will see a message in a later update that it “moves to a new home.” It is still an accessible tool, but you can use the Snip&Sketch or the Win+Shift+S keyboard shortcut that you mentioned earlier.
Click Mode to extend menu with the Snipping Tool opened. Four screen capture options are available: Draw a Free-Snip window, select an area box (Rectangular Snip), catch the existing window, and record the entire screen (Window Snip) (Full-Screen Snip).
Click Mode to extend menu with the Snipping Tool opened. Four screen capture options are available: Draw a Free-Snip window, select an area box (Rectangular Snip), catch the existing window, and record the entire screen (Window Snip) (Full-Screen Snip).
Notice that the screen turns white when using the Freestyle and Rectangular modes. Once the screenshot space is defined, the white colour is clear in that region. If your screen tints white, except for contents inside the window you pick (window snip). If you capture a particular window.
There is a delay function in the Snipping Tool. You can wait for a screenshot to snap between one and five seconds, so you can record an exact moment in a video or animation.
After a screenshot has been captured, your screenshot will display the Snipping Tool interface. Light edits such as a marker, highlighter and eraser may be carried out. To perform more edits in this new programme, you can also press the colourful Paint 3D button.
When editing is completed, click on the upper left hand corner of the file, then click the Save As menu option.
Alternative: Snip & Sketch

Snip & Sketch is the latest snipping tool of Microsoft. You can use the start menu or tap Win + Shift + S on your keyboard. You can access this tool.
When you use the keyboard shortcut, the screen turns dark and allows a toolbar with five buttons at the end. You have the same features in the older Snipping Tool, however your screenshots cannot be saved as a file. Rather, the picture goes directly to the clipboard first. A desktop note that tells you that the image has been copied to the clipboard is also available. You can edit the image captured in the Snip & Sketch application by using this same notification. Click on the Desktop Notification to access this latter alternative. Clicking on the notification loads the screenshot inside the app to allow a photo to be cleared and a pen, pencil, highlight and eraser applied.
If you are instead loading the Snip & Sketch app, press the down-arrow in the top-left corner next to the New button and pick Snip Now in the down-to-bottom menu. The screen gets dark and the toolbar with five buttons is displayed. Please take your snip and automatically load your desired picture in the Snip & Sketch app, ready for editing.
Save the picture anywhere in your PC when you’re ready by pressing Disc-Style. To edit and save your picture shot using an installed image editor, select the Open with choice on the drop-down menu, using the Three-Dot icon on the toolbar.
Third-party alternatives
We suggest trying LightShot if you want more choices to choose your screenshots and customise them. (and do not care to download a new app) It’s free and runs on Mac and Windows. LightShot could be a better choice for more technical or important editing work or screenshots.
GNU Image Processing Software or GIMP is also suggested. It’s a creative open source platform that doesn’t cost for a subscription to Adobe Photoshop. It offers everything you need to create artwork, edit pictures in high resolution, and more.
Also Read How to take a screenshot on iphone 2021