All Estus Shard Locations In Dark Souls 3. Finding every Estus Shard location inside the Kingdom of Lothric is one of the most critical things players must complete in Dark Souls 3. Estus Shards are necessary to enhance the Estus Flask in the same way that Bone Shards are required to upgrade the Bonfire in Dark Souls 3. There are eleven Estus Shards to locate in Dark Souls 3, and with so many of them buried in obscure areas, finding them all can be difficult.
Because they are the standard healing items in Dark Souls 3, as well as any other Dark Souls game, Estus Flasks are one of the game’s most important aspects. Players can recharge their Estus Flasks by resting at Bonfires, allowing them to use them to heal in between Bonfire locations in Dark Souls 3. Though typically only five Estus Flasks can be replenished at a time, spending a Humanity to kindle a Bonfire doubles the number of refilled Estus Flasks to ten. Players will need to find more Estus Shards and be able to utilise the Rite of Kindling to refill more flasks.
Players can turn in Estus Shards to Blacksmith Andre in the Firelink Shrine to get more Estus Flasks after finding them. Though Dark Souls 3 gives players only three Estus Flasks to begin with, players can eventually carry up to 15 Estus Flasks. This contains the one Ash Estus Flask found in the game’s first location, as well as the eleven shards scattered throughout Dark Souls 3, all of which considerably improve Estus.
Every Estus Shard Location In Dark Souls 3
In Dark Souls 3, some of the Estus Shard sites are more difficult to locate than others. However, with the growing toughness of opponents in Dark Souls 3, finding each of the Estus Shards is definitely worth the effort.
ALSO READ: How To Defeat Agents In Genshin Impact
Following locations in Dark Souls 3:
- 1. Purchase the Tower Key for 20,000 Souls at Estus Shard 1 (Firelink Shrine), then climb the tower and drop down on the left side of the bridge. Enter the building and look for the Estus Shard near Pickle Pee’s nest on the ledge.
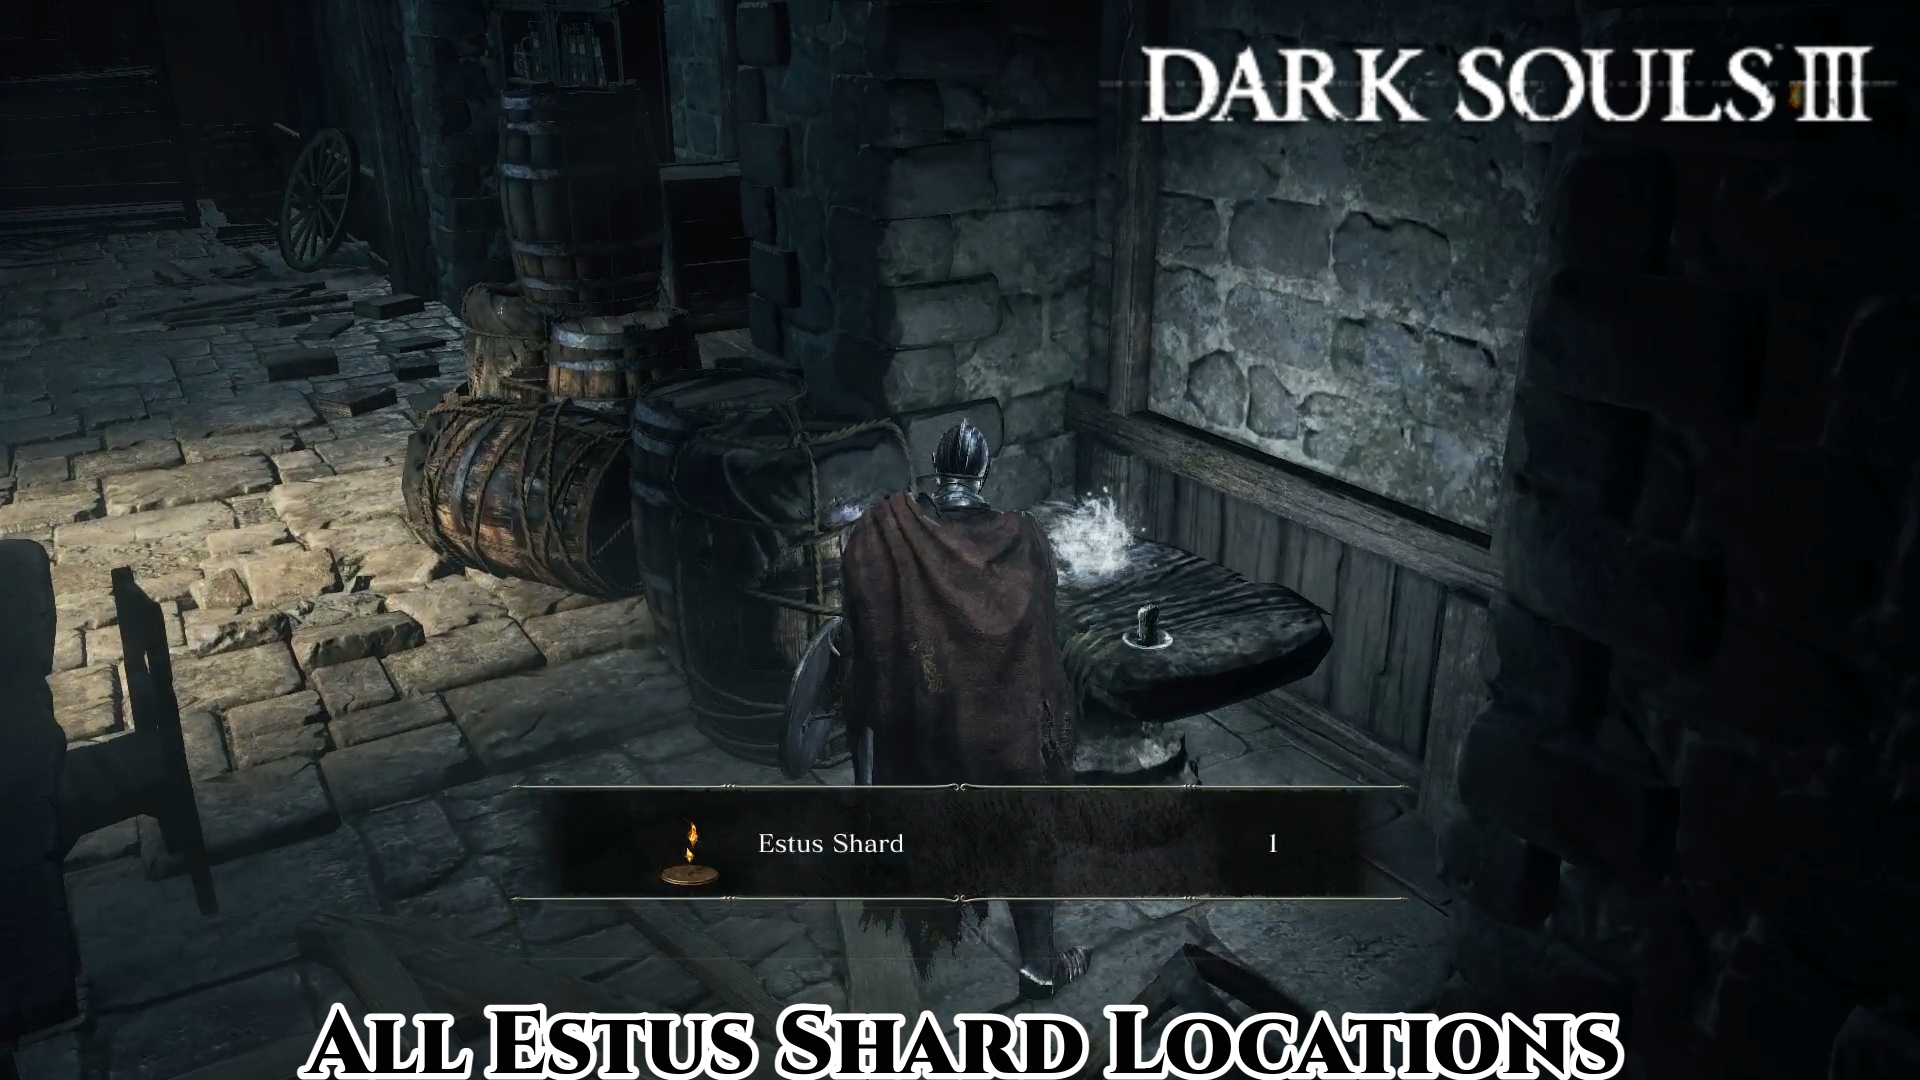
- 2. Estus Shard 2 (Lothric High Wall): Go across the roof and into the left-side building from the middle of the tower. Defeat the nearby foes before grabbing the Estus Shard from the anvil.
- 3. Defeat the Hollow Peasants at the region of the burning tree in Estus Shard 3 (Undead Settlement). After that, look for the Dark Souls Estus Shard at the base of the tree.
- 4. Estus Shard 4 (Road of Sacrifices): Go left and kill the four Lycanthrope Hunters, then drop down on the ledge to the left to find the Estus Shard.
Estus Shard 5 (Farron Keep): From the campfire, run straight forward and turn left to pass through an archway. Destroy the slugs defending the Estus Shard and take it for yourself. - 5. Estus Shard 6 (Cathedral of the Deep): After departing the chapel, walk towards the cemetery and look for the Estus Shard on the pathway.
- 6. Estus Shard 7 (Smouldering Lake): To find the Estus Shard, break the illusionary wall on the right, proceed along the route, and fight the Rotten Flesh foes.
- 7. Estus Shard 8 (Anor Londo): Continue along the road leading to the boss gate in Anor Londo’s main hall to find the Estus Shard in a chest in the corner of the hall where Dark Souls 3 foes drop from the ceiling.
- 8.Estus Shard 9 (Irithyll Dungeon): Enter the Giant’s Cell by following the road that leads out of the dungeon. To obtain the Estus Shard, defeat the Mimic Chest.
- 9. Take the elevator down to the garden and jump halfway onto the balcony above the garden. Estus Shard 10 (Consumed King’s Garden): The Estus Shard is located on the right side of the road.
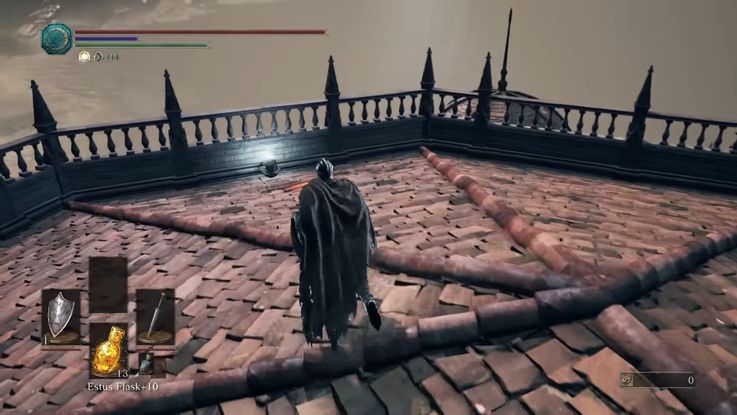
- 10. Estus Shard 11 (Grand Archives): On the roof of the archives, turn around and climb the staircase, then continue to the far side of the roof past three Golden-Winged Knights to uncover the final Estus Shard in Dark Souls 3.