Ffxiv Universal Markers Guide. There's plenty to see and do throughout Eorzea and beyond in Final Fantasy 14, with the more difficult activities arriving after you've completed the MSQ. Even if you have hundreds of hours under your belt, several mechanics might trip you up, forcing you to die in a raid or trial.
There are so many mechanics presented at you across the game's many dungeons, trials, and raids that knowing them all before diving into the fight is nearly impossible. Understanding the most prevalent universal marks can assist you in overcoming many of the problems you'll face in Final Fantasy 14, allowing you to avoid death and frustration.
Table of Contents
Area of Effect Markers

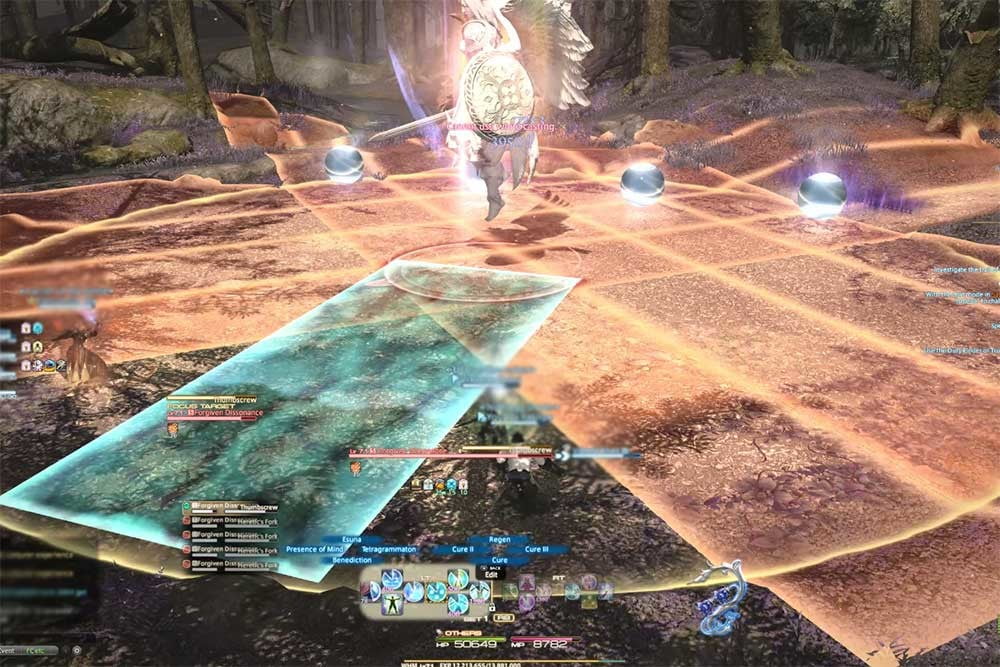
Effects Area (AoE) Markers come in a variety of forms, sizes, and appearances, but they all follow the same basic principle: get out of the path of the giant coloured circle. However, there are a few that need to be discussed more, which are listed below.
Standard AoE
This is the most common AoE Marker you'll come across during your Final Fantasy 14 quest. Before they assault, the opponent will cast a giant orange circle around you, which you must get away from. You'll usually have plenty of time to get out of harm's way, although this changes depending on the enemy.
Donut AoE

The Donut AoE is another popular AoE Marker that you'll see from time to time. This move creates a wide ring on the ground, requiring players to remain in the centre to avoid being hit. At random, the adversary will throw a Donut AoE on another player, themselves, or on the ground.
Tracking AoE
While the majority of AoE Attacks are immobile, some will arrive in a succession of successive strikes, pursuing one or more players. Tracking AoE Attacks are a type of attack that forces the player to flee repeated attacks until the bombardment is over. Furthermore, each AoE Attack can leave something behind, preventing you from reversing your pathing and pushing you to be conscious of your pathing.
Mine AoE
Mine AoE Attacks are marked by circles that are set around the arena's ground and will detonate if a player walks through them. Be aware that this AoE is usually accompanied by opponent assaults that attempt to force you into the circle, so keep that in mind. The explosion will deal considerable damage to you and your allies, as well as afflict you.
Stacking Markers
Stacking Markers are a crucial mechanic in Final Fantasy 14, as they exist in practically every dungeon, path, and raid. However, there is almost no guidance on how to properly deal with it, which may force many novices to learn the hard way if the marker is placed on them.
Stack/Soak Marker
The most prevalent Stacking Marker in the game is the Stack/Soak Marker. When you or a teammate see four arrows surrounding them, it implies a high-damage assault is ready to hit them. You want to share the attack's damage with the rest of the team. Simply stack the entire party on top of the target to distribute the damage. The majority of novices or players who are unfamiliar with the mechanism will flee from their teammates, resulting in instant death.
Line Stack/Soak Marker
The Line Stack/Soak Marker is similar to the ordinary Stack/Soak Marker, except instead of an AoE, the monster' strike will be a straight line. This allows ranged users to stand on the marker's edge while melee DPS and Tanks cluster close together. You'll split the damage in the same way that the other entry did.
Triangle Stack Marker
You must find at least one other player to share the damage with when a red Triangle Stack Marker appears above you and your teammate's heads. If you do not find a person to stand behind before the assault begins, you will most likely absorb enough damage or receive a debuff. Please keep in mind that you can stack more than two persons to counter an attack as long as you aren't standing alone.
Gaze Markers
Gaze is another mechanic that appears from time to time in Final Fantasy 14, and it might catch some players off guard if they aren't expecting it or aren't familiar with it.
Gaze Marker
A red-eye marker on the boss and a cast timer signify the normal Gaze Marker, which affects everyone in the party. To avoid getting an affliction cast on you, you must glance away from the boss before the cast timer expires. You'll usually have plenty of time to shift your sight from the boss, but if you caught peeking, you'll in big trouble.
Cone Gaze Marker
On the monster, a red-eye marker will emerge, along with a cone indicating the attack's range. The only players who must avert their attention are those who are inside the cone. Everyone else allowed to continue attacking/gazing at the boss.
Stack Gaze Marker
Along with the Gaze Marker, a purplish-pink Stack Marker will appear above a party member. To evade the boss's stare, form a group and look away from it to absorb the damage.
Also Read: How To Get Kleavor In Pokemon Legends Arceus
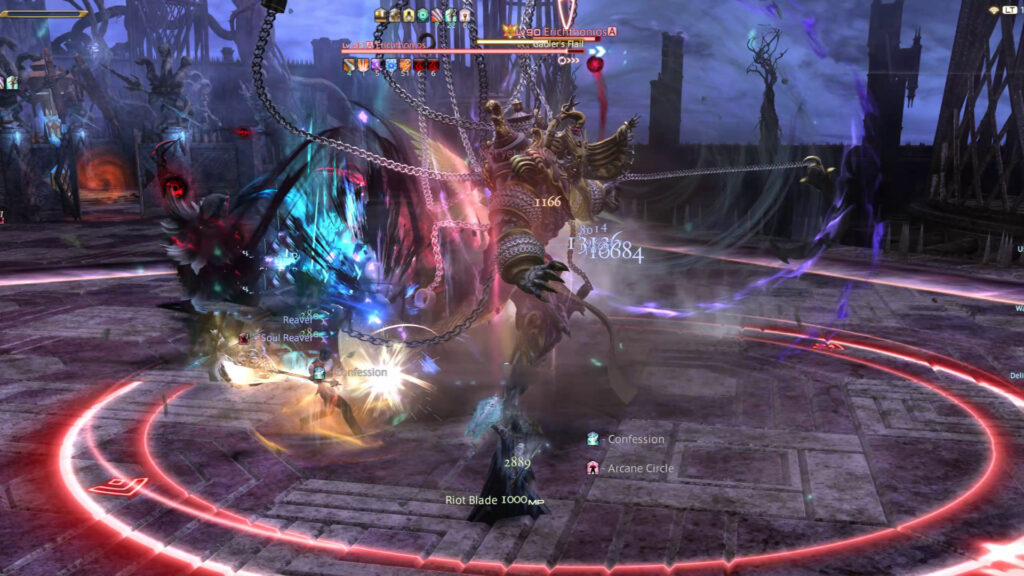
Tether Markers

In Final Fantasy 14, there are a lot of Tether Markers. These markers will link a player to something else in the arena, such as the boss, another player, or a rift. Typically, whoever becomes tied must complete a specified task in order to become untethered, or they will suffer some sort of sickness or damage.
Fire Chain
The Fire Chain tether will connect two players and damage them on a regular basis. Move in close proximity to one another before applying the tether's effects, then run in opposite directions.
Orange Tether
The Orange Tether will link a player to an adversary, indicating them as a target for a future mechanism. If other players pass through it, orange tethers can passed on to them, allowing for some strategy and administration.
Purple Tether (Boss to Adds)
A Purple Tether frequently seen linking the boss to the adds (additional enemies). This implies the boss indestructible until the tethered additions dispatched, so concentrate on them!
Purple Tether (You to Source)
When you're in range of a Purple Tether, it will usually apply damage and status effects anytime you're in range of it. To get away, simply run away from the tether's source.
Red and Green Tethers
If two players are too far away, this will bind them together and apply a status effect. Maintain a tight proximity to one another and move in lockstep.
Swap Tether
This will bind two players together and allow them to swap positions once a certain amount of time has passed. Prepare to swap tasks with anyone you bound to.
Distance Tether
Tethers a player to an adversary, delivering damage according to their distance from the source. The damage is less severe the further away you are.
Aetheric Boom
A number of orbs will spawn and become connected to one another. If the orbs come into contact with each other, they will cause massive harm. When you run into them, the damage shared throughout your group.
Akh Morn Tether
Tethers the main tank to the nearest party member, signalling that the following tankbuster attack should anticipated. To reduce the chances of a lethal strike, both tanks in the party should stack and distribute the damage.
Knockback/Draw In Markers
There are a variety of powers that will knock you back or draw you in closer the ground marker, which can be difficult to adjust to when you're in the heat of battle.
Impact
Creates a ground-based Impact zone that deals damage proportional to the distance between the player and the zone. Attempt to get as far away as possible from the Impact. While Impact doesn't always have a chance to knock you back, it does occasionally, so make sure you're not near a death barrier or any other dangers.
Knockback Circle
Anyone inside the Knockback Circle will take a lot of damage or even die, but anyone on the outside will knocked back. To prevent knocked into death barriers, stand near the circle edge. Knockback Circles' knockback usually prevented by Arm's Length and Surecast.
Tidal Wave
You will thrown back in a straight line by a tidal wave. To avoid the influence of a Tidal Wave, stay near to the source and use Arm's Length or Surecast.
Magnetism
Above random players, Magnetism will set Plus and Minus icons, bringing opposites together and pushing the same markings apart. Opposing marks must avoid getting too close to each other to avoid damaged. When facing Magnetism, there are always AoE Attacks that you must try to avoid.
Cursor Marker
A Cursor Mark, a spinning pointing finger over your head, may appear on occasion. When you're not moving, the Cursor Marker will spin and then lock into position. You can only move in the direction where the finger is pointing. Small, controlled steps should taken until you achieve the desired position.
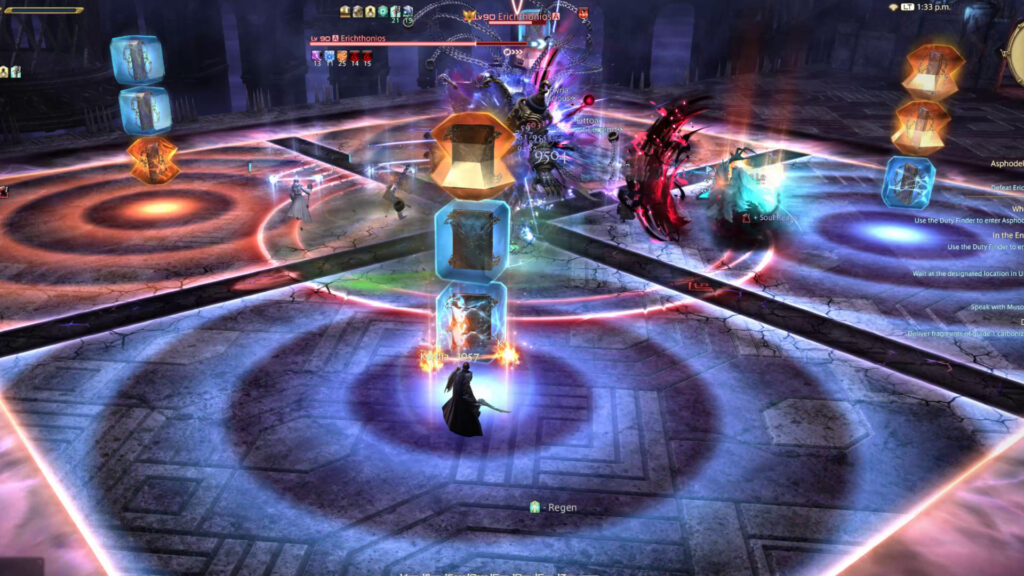
Tower Marker
If no one stands in the towers at the end, they will explode and cause severe damage/inflict diseases. Some Towers can only be occupied by one person, while others require dozens (indicated by a visual effect). Tanks should make taking Towers a priority.
Ice Floor
When you move on an Ice Floor, your position frozen in the direction you move, and you will slide in that direction for a specified distance. By carefully arranging your movement, you can escape AoEs and other hazards.