
How To Check Graphics Card Memory On Windows 10 Microsoft presented us with the most versatile version of Windows, Windows 10, in response to the horrendous Windows 8, which was panned by both critics and users. It is installed on 43 percent of computers (as of April 2019) and has received significant updates in recent years. Although there are only a few major differences, what matters is the hardware inside your computer. And if you bought a PC without knowing what components are inside, we'll walk you through the process. This tutorial will show you how to determine the total amount of graphics card installed on your Windows 10 PC.
Table of Contents
How to Examine Graphics Card Memory in Windows 10
There are four ways to test the GPU on your Windows 10 PC. One method is ridiculously simple, while another may require a few steps to reach your Holy Grail.
Method 1: Show the adapter properties.
This method is simple, and anyone can use it with ease. Navigate to your desktop by pressing the Windows logo + D. Select Display settings from the context menu when you right-click on the desktop.
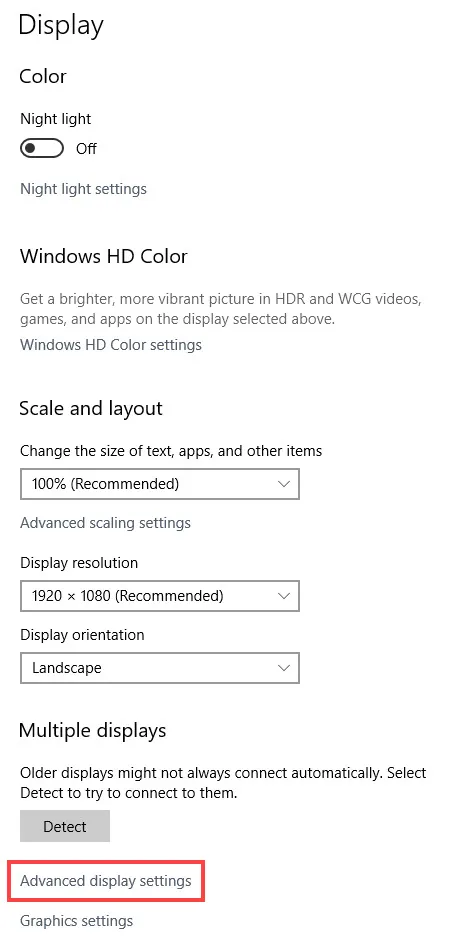
When the dialogue box appears, choose Advanced display settings.
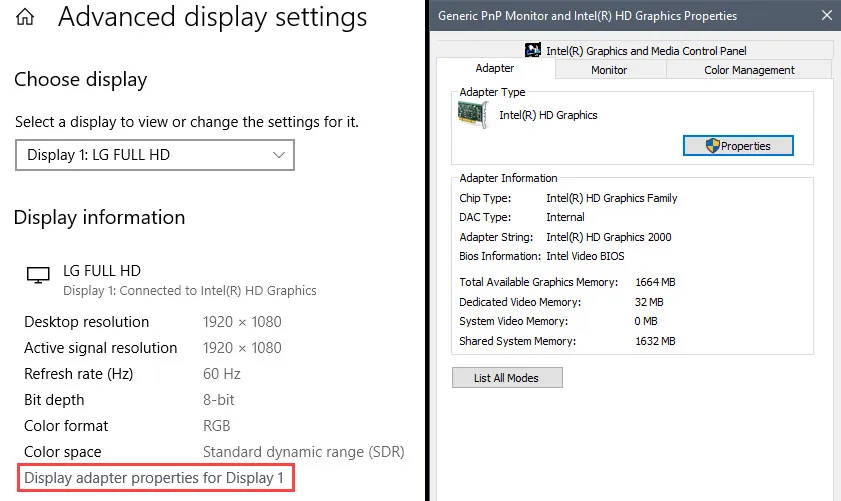
A new window will appear. Simply select Display 1 and then click on the Display adapter properties button. This new window will provide you with all of the information you require. Under the Adapter Information section, the amount of VRAM on your computer's graphics card will be listed next to Dedicated Video Memory.
Display adapter properties is the simplest way to determine how much memory your graphics card has.
MSINFO is the second method.
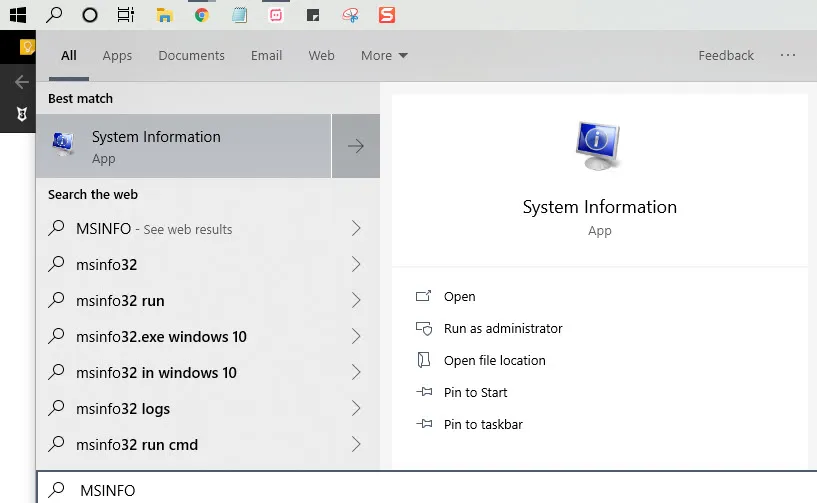
This option provides a wealth of information about every aspect of your computer. MSINFO can be found by going to the Start menu and typing MSINFO. Your search results will show System Information at the top. Simply click on it.
ALSO READ:How To Hide Whatsapp Status From Specific Contacts
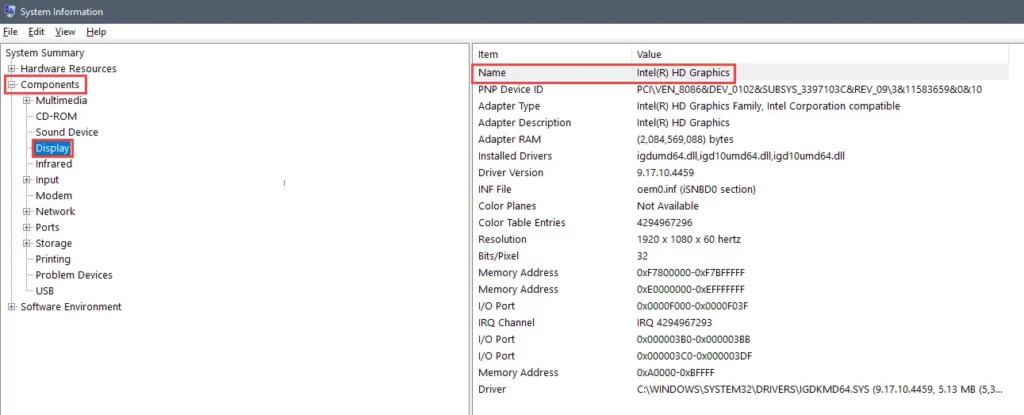
When it opens, go to the left-hand pane and select Components, followed by Display. You'll see a screen pop up with detailed information about your graphics card, as well as other hardware. The name of the graphics card or cards is what you're looking for.
DIRECTX DIAGNOSTIC TOOL (Method 3)
It is relatively simple to launch the DirectX Diagnostic Tool. By pressing Windows Logo + R, you can launch the Run command. Enter dxdiag in the search box and press OK.
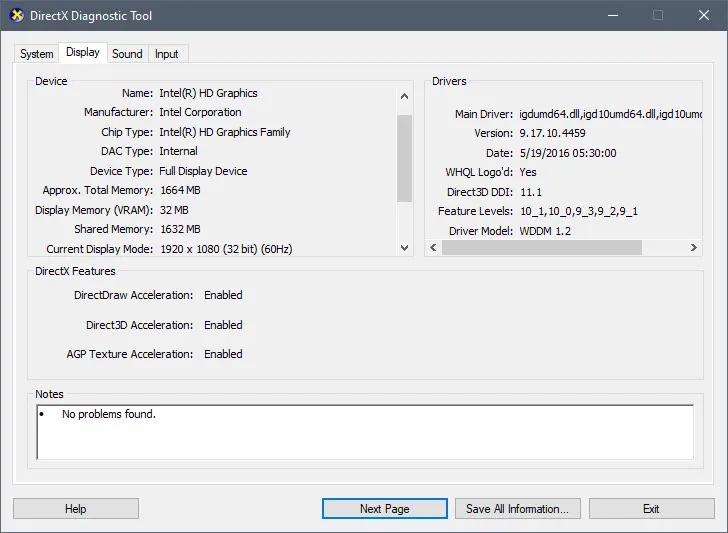
Individual tabs for your system, display, sound, and input will greet you when you launch the DirectX tool. Select the Display tab to view information about our system's current display preferences, such as the graphics card make and model, the amount of VRAM in your graphics card, and the current resolution of your device.
CPU-Z is the fourth method.
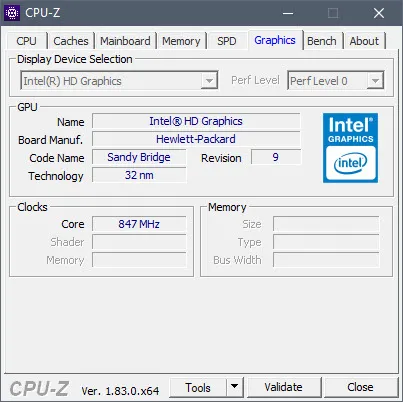
There's always the option to look outside of system tools, and what better third-party app to use than CPU-Z? Install this application after downloading it. It will take some time for your PC's graphics card to be detected. When you open this app, you'll notice that you can get information on much more than just your GPU. On the top, click the Graphics tab. The app can also read a GPU's genes and display any information it finds about it.
These methods are a sure way to know your PC, whether you are buying new computer games or checking your specs as a hobbyist.