
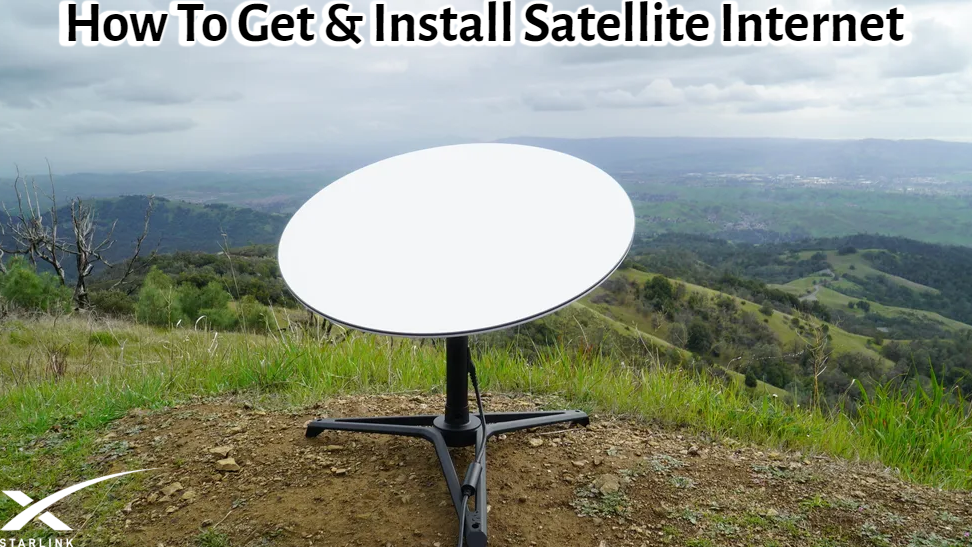
How To Get & Install Starlink Satellite Internet. Starlink, Install a satellite-based internet service, provides exceptional speeds almost anywhere. What you need to know and how to get start outline below.
If you live in rural America, you're well aware that millions of people lack access to cable. Or fiber internet, let alone the gigabit speeds accessible in other regions of the country. How To Get & Install Starlink Satellite Internet. As a result, many consumers limited to speeds of 25 to 40 Mbps via DSL or a similar service.
Even President Joe Biden(Opens in a new window) has expressed concern about the fact. That 35% of Americans in rural areas lack access to install high-speed Starlink satellite internet. More than a quarter-million Americans still use dial-up, according to the US Census(Opens in a new window). Worse, 13 million people have no access to the internet at all.
Although 25Mbps is adequate for checking email. And social media for one or two individuals, it is insufficient for online gaming or 4K video streaming. What if you have more than two persons in your house who wish to use the Install Starlink Satellite internet? It not unlike days when you had to holler at your siblings to get off the phone. So you could use your dial-up connection.
I ran across dilemma when I just relocated from well-connect Utah metropolis to significantly more rural region in Idaho. But there was another complication: my profession. Which requires me to work remotely for one of the world's largest tech review sites. Places greater demands install on my home starlink satellite internet connection than merely checking email. Or watching the occasional YouTube video. For example, evaluating computers can include downloading as much as 70GB of data in a single day! Clearly, the 40Mbps (at most) speeds quoted by local DSL providers in southeast Idaho weren't going to cut it.
Thankfully, there's a new option on the market: Elon Musk's SpaceX's Starlink satellite-based internet service. It has been a key component of relocating my tech-heavy lifestyle out of the city and into the country. With promises of 150Mbps speeds and dead-simple installation.
Table of Contents
What Is the Best Way to Get Starlink?
It's not tough to get Starlink for your home. It's as easy as plugging your address into SpaceX coverage map to confirm. That your location covered by Starlink service region. Then signing up for the service at Starlink.com(Opens in a new window).
It only takes a few moments to sign up; all you have to do is submit your physical address and payment card details. When you sign up, you'll learn whether you'll receive your Starlink kit within the customary 2-week timeframe. Or if you'll placed on a waitlist for an undefined period of time.
I completely expected to placed on the waitlist when I join up. As I had heard from other Idaho users who had waited weeks. Or months for their Starlink kit. Those delays were never an issue for me, and I received my kit just two weeks after signing up.
And obtaining the kit is the most difficult aspect of the entire procedure. Monthly billing is simple and handled online; it's an automatic payment, so once you've signed up, you can set it and forget it. And, when you're ready to cancel service. You can do so through the same web portal, with no early termination fees or penalties.
How much does Starlink set you back?
You don't sign an equipment rental agreement like you would with a cable company when you sign up for Starlink. Rather, you purchase the Starlink gear in advance. It's a bit pricey ($599 plus a $50 handling fee), but there are no ongoing equipment costs. After then, the service costs $110 per month for as long as you want it. There is no long-term commitment, and you may start and quit whenever you want.
What Does the Starlink Kit Include?
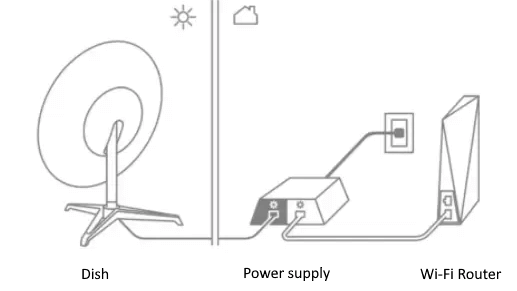
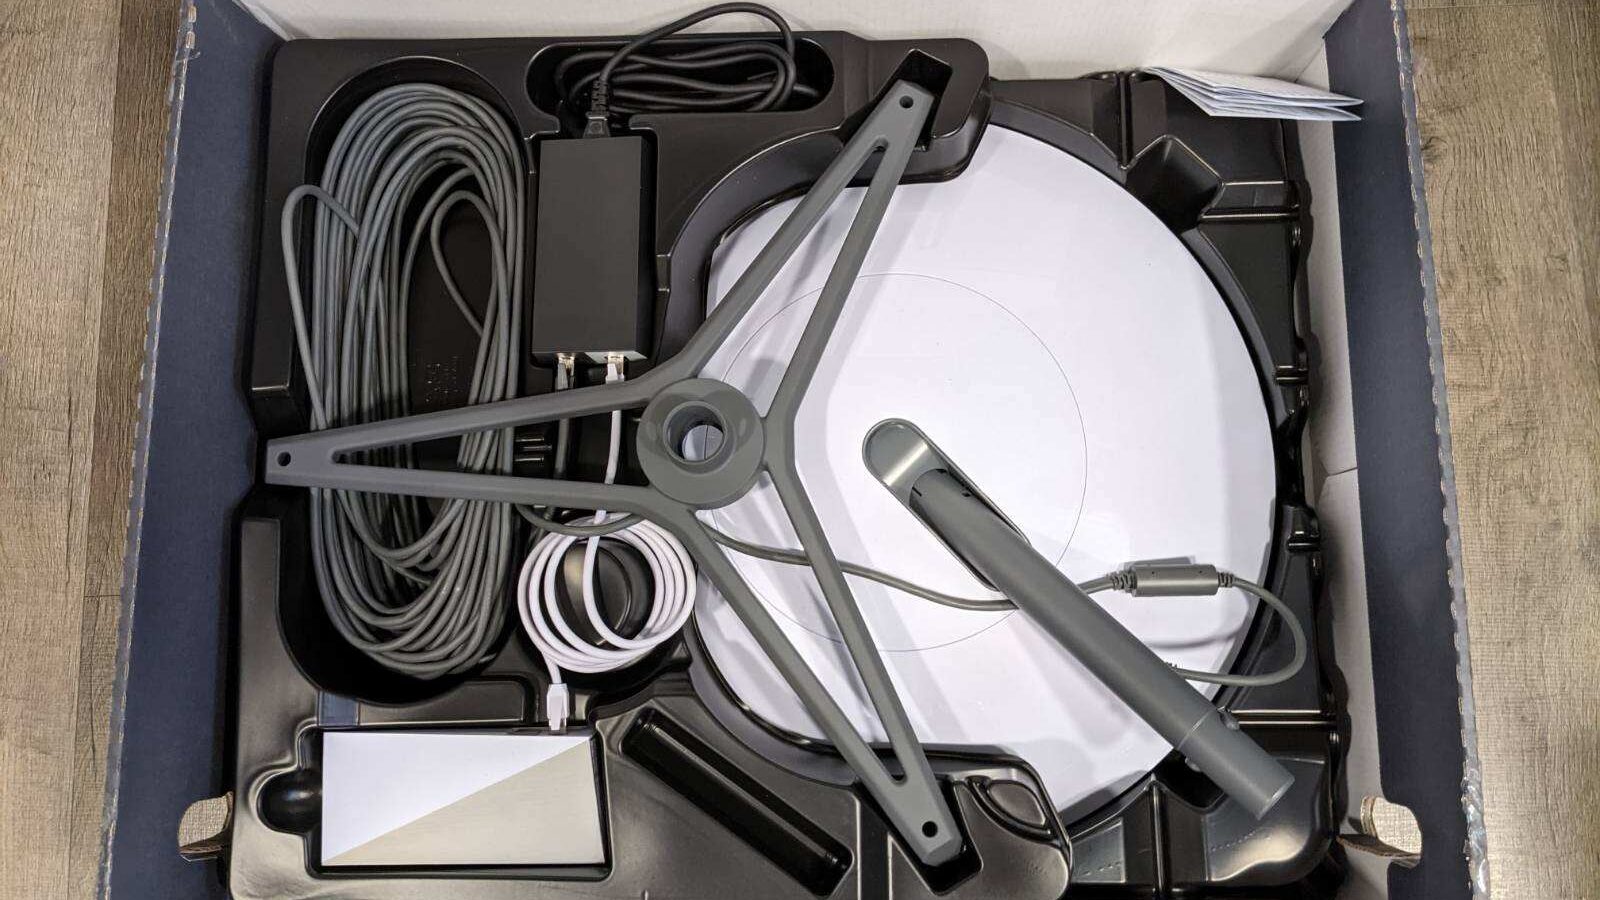
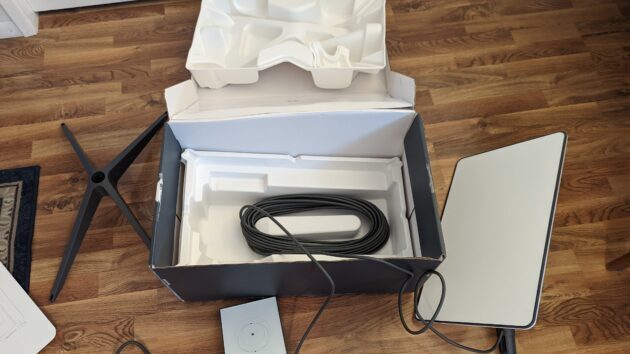
The Starlink kit includes everything you'll need to get start. Including a Starlink dish, a dish mount, and a Wi-Fi router base unit. A power cord for the base unit also includ. As well as a 75-foot wire to connect the router to the dish.
Additional accessories, such as longer cables, additional mounting gear. And adapters for connecting other devices over conventional Ethernet, are available through Starlink(Opens in a new window).
A rather basic instruction leaflet with drawings. But no text included in the box (except the URL to Starlink support). However, some of the finer information not shown on this page. The dish mast, for example, clicks into place in the mounting tripod. But the cable must threaded through the tripod and plugged into the dish mast first. Both ends of the cable have the same connector type, but different shaped plugs. It's easy to remember which end goes into dish and which end goes into the base unit because of this. All of the plugs have water-resistant seals and should be able to endure bad weather.
The setup is rapid (you'll have a live connection shortly after opening the box). But fine-tuning the dish position for best performance may take longer.
The Starlink Kit unboxed.
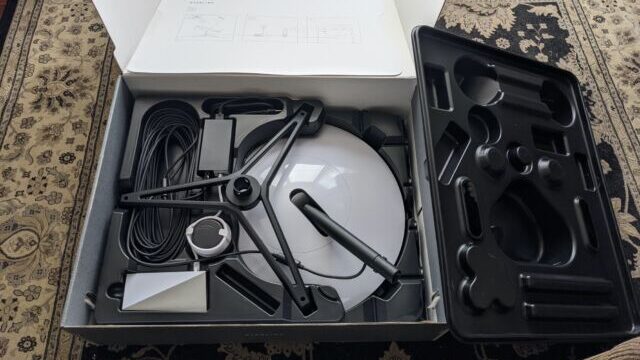
The setup instructions, the Starlink receiver dish, a mounting base, the Wi-Fi router. And a 75-foot wire to connect the dish and router should all be inside the aforementioned Starlink kit box.
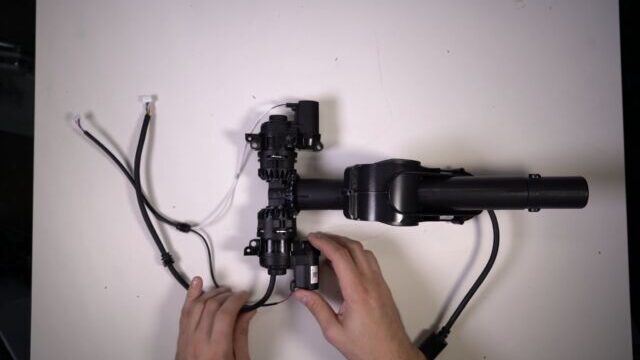
I got the most recent version of the kit: The second-generation dish is rectangular, whereas the first-generation dish was spherical.
The dish doesn't require a power cord because it uses the single connection cable to provide both power and data.
The Starlink Wi-Fi router is the key to your new high-speed internet connection. And serves as the foundation for bringing Starlink internet into your house. By using the same guidelines for placing ordinary Wi-Fi routers. You should be able to select an appropriate location for the router.
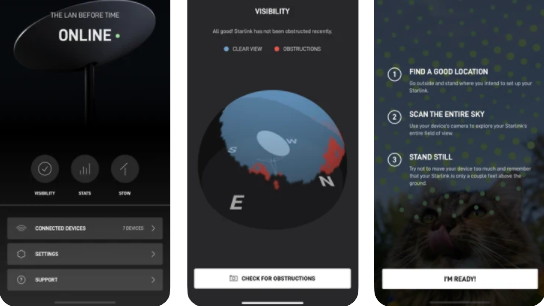
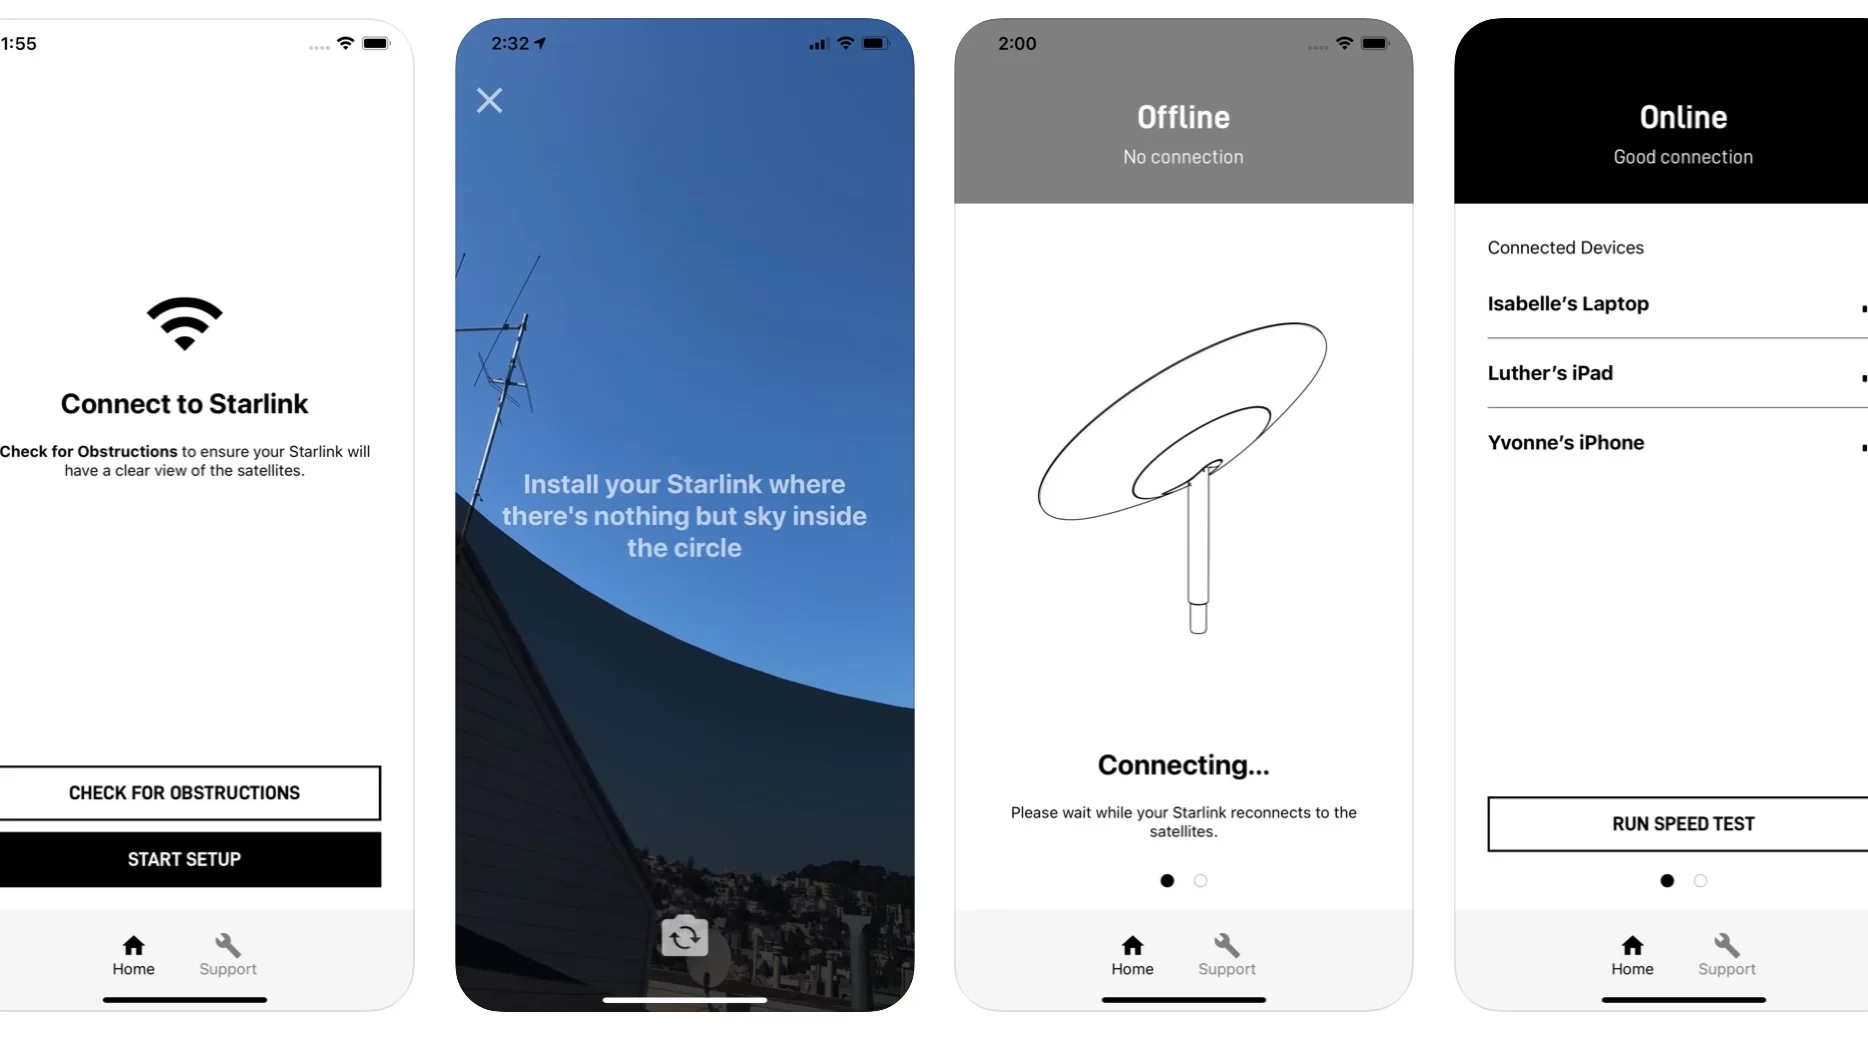
There are two connections on the bottom: one for electricity and one for connecting to your Starlink dish. For wired connections, there are no Ethernet ports. In addition, unlike a typical cable modem, the Starlink box only has one flashing LED. That indicates if the router turned on. It also not visible from the front of the unit—hidden it beneath the wire connector. If you want to see if your Starlink system is online. You can use the smartphone app that comes with it (available for Android and iOS).
Installing Starlink is simple.
Put The Dish, Stand, And Cable Together.
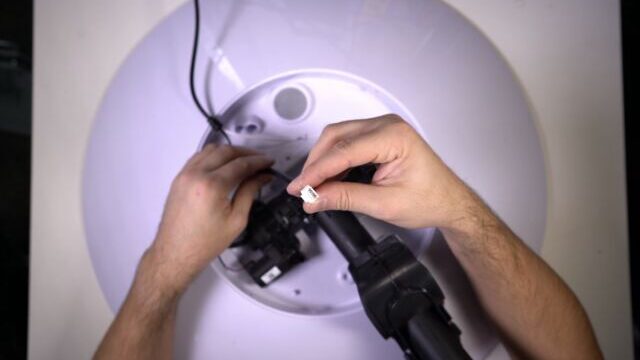
After you've unpacked your Starlink kit, you'll need to put the dish and mounting base together. Start by unplugging the dish's connection cable. Which comes plugged in and must unplugged in order to seat the dish mast into the mounting base.
The dish mast should then inserted into the mounting base. Make that the groove on the mast corresponds to the matching rail within the mount.
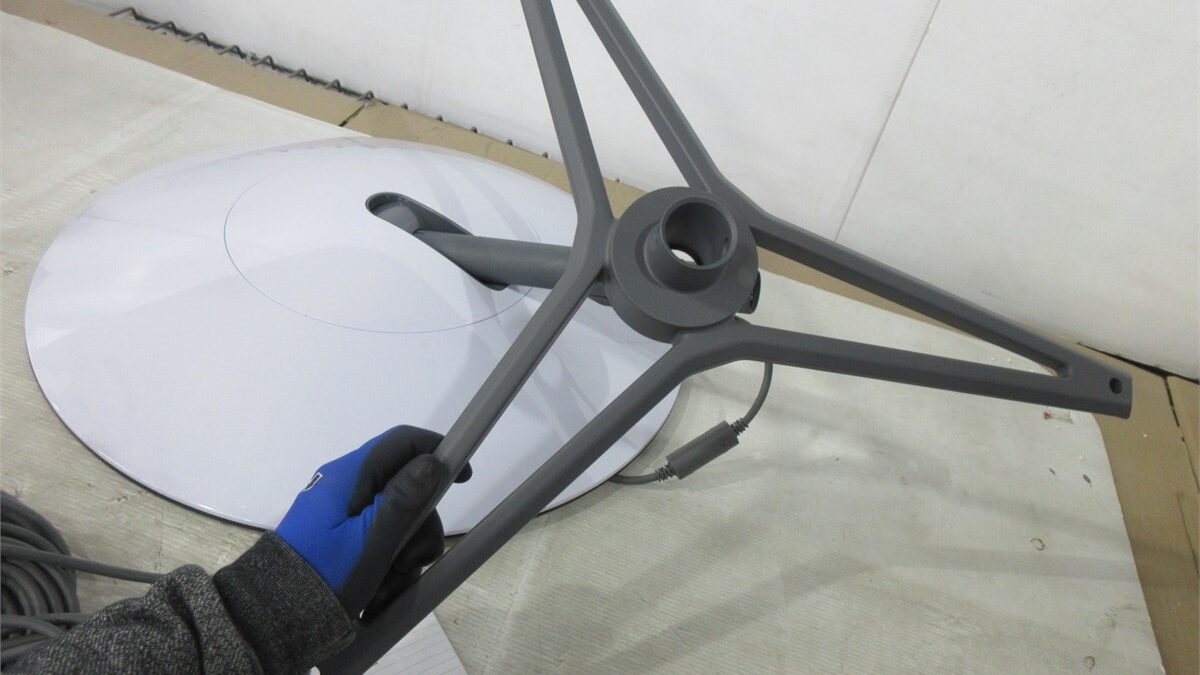
Once the mast is in place, use the straight plug connector to attach the 75-foot connector cable. As previously stated, the two ends of the cable have different shaped connections. Thus determining which end is proper should be simple.
Make sure the cable connector inserted far enough. When the plug properly seated in the socket, you should hear a clear click.
I was able to carry and transport the full assembled dish and mount around by myself.
Choose a Good Spot for the Dish
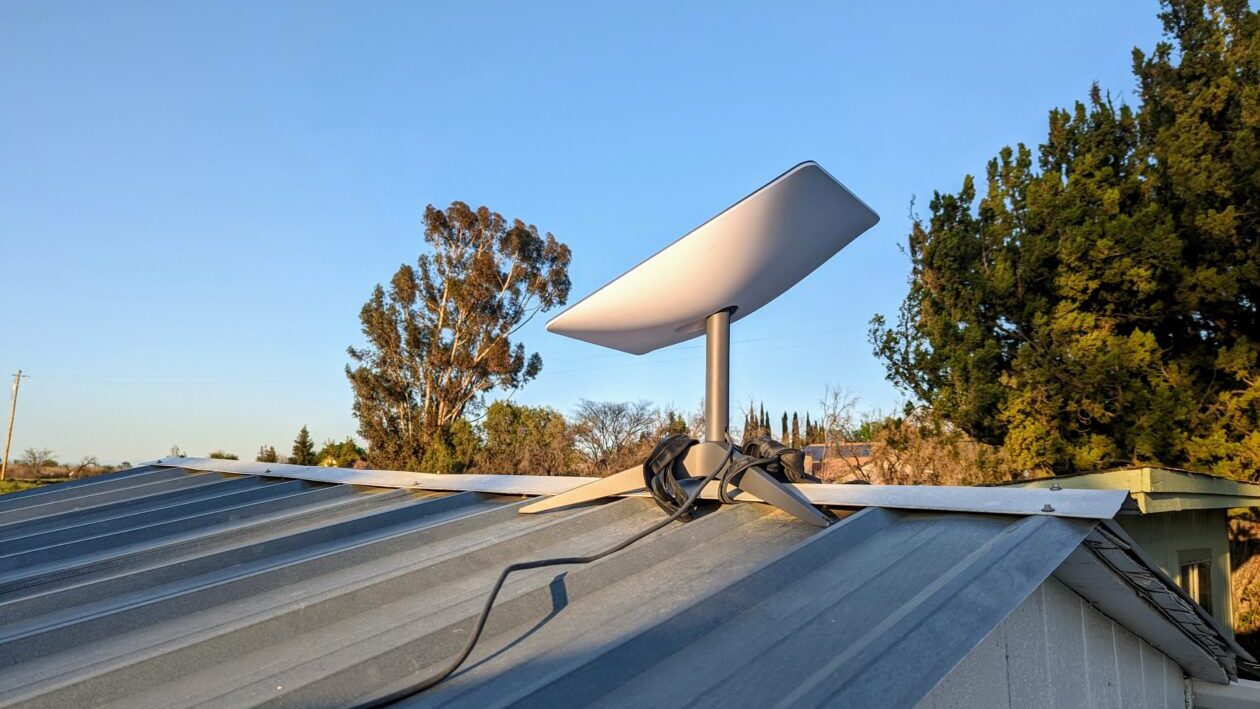
The constructed dish must next mounted and positioned for best satellite reception.
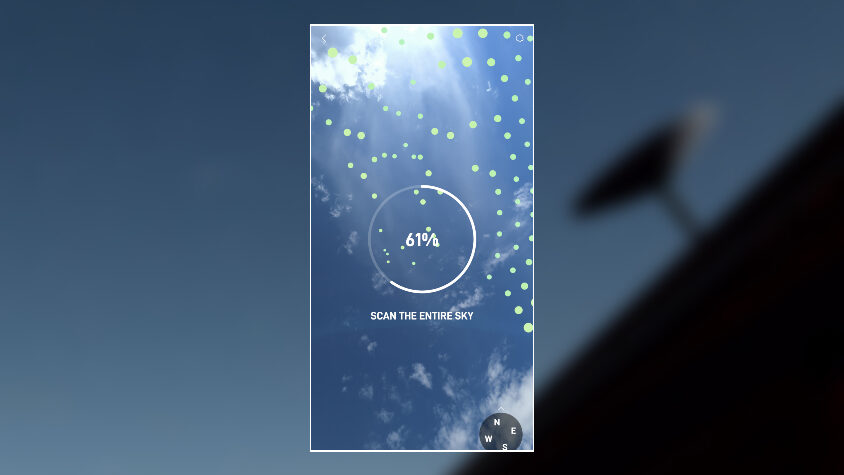
Use the Starlink app to discover a decent position; it features an interactive tool that helps you find and validate the right position for a new dish. But the recommendations are simple to follow. A clear view of the sky required. With at least 100 degrees of obstruction-free space above and surrounding the dish. Because the dish does not retain a stable orientation, a huge clear swath of sky required. The dish contains a motor and will adapt to maintain a connection with passing satellites. Even if you only mount it in one position.
An open field, a rooftop, or any elevated structure (such as a pole). That is above impediments like as fences, buildings. And trees are also good options for mounting positions.
With the Starlink app, you scan the viewing area of the dish with your phone's camera. The procedure entails pointing the camera up into the sky. Which may necessitate some creative positioning on your part to allow you to see the screen while moving the camera. Ideally, the camera should be at around the same height as the dish, which is at knee height. The simplest way for me to achieve. This was to lie down on the ground and scan the area with my phone.
The software will lead you through the steps. Which include pointing the camera up at the sky and sweeping around the perimeter of the viewing area. Green dots appear on the screen to represent sections of the dish's range of vision. That have yet to scanned. And a convenient arrow indicates which area to scan next.
The program takes a while to process the data after you've scanned a large enough area of sky. It tells you whether or not you can receive clear reception from. That position after a few moments of data crunching.
Install the Dish
It's time to attach the dish after scanning and checking your position. That simply means placing the dish mount on the ground in a simple installation like mine. However, you may not have the same amount of open space as I do. Or you may not live in a community where you feel comfortable leaving your $600 dish out in the yard.
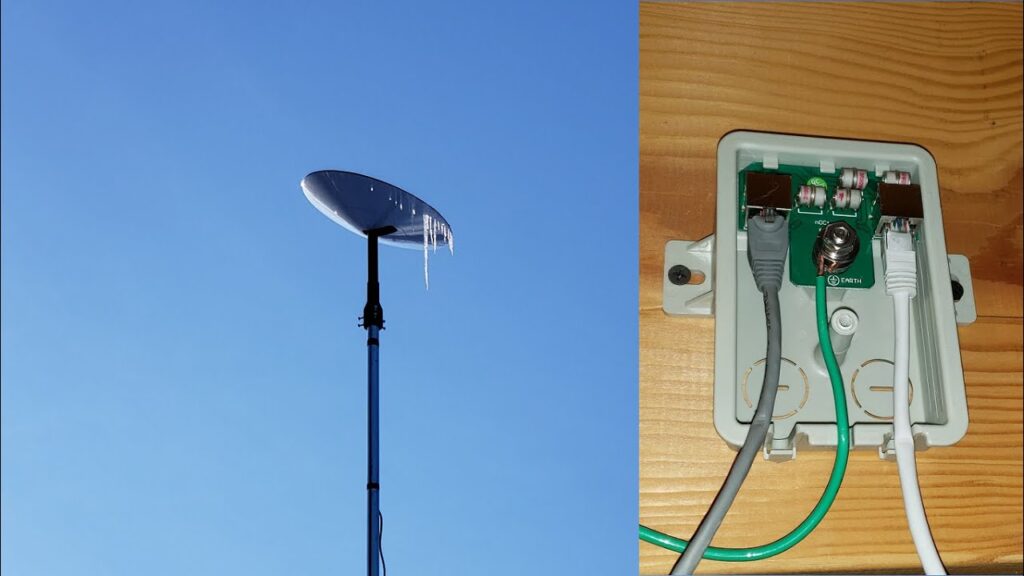
All four feet of the mounting base have holes for screwing down firmly. These can used to secure the mount to a roof or a fixed structure. As well as to stake it down on the ground. Screws and stakes not included in the kit; you must provide them. An additional adapter required for alternative mounting choices. Such as on a pole or a previously installed satellite dish mounting assembly.
If you're concerned about the weather, particularly ice and snow. The Starlink dish has an inbuilt heater that detects below-freezing temperatures and warms up to melt any frozen obstacles.
Connect the Cables
After the dish is in place, connect the cord to the router. For the majority of users, this entails bringing the cable into their home. I simply ran the cord through an open window for my initial setup. It a quick (and temporary) fix, but it the job done.
Drilling a hole through an outer wall is another possibility. Starlink offers cable routing devices for normal walls as well as bypassing masonry or concrete.
After you got the cable into your house. All you have to do now is hook it into your Wi-Fi network.
Use the angled plug connection on the 75-foot connector wire to accomplish this. This plug connection has a distinct shape that should aid in its identification. It can only plugged into the Starlink router in the correct direction.
You'll also need to connect the router's power cable, which will power both the router and the dish.
Return to the Starlink app after your connection is active and the router is up and running. You may check the status of your network connection there.
Be patient as the dish establishes a link to the satellites above in a few moments. It's a speedy (but not immediate) procedure. The app notifies you that you are online and allows you to set up your Wi-Fi name. And password after the dish makes a connection.
What Is the Speed of Starlink?

You should have internet connectivity if you've completed all of these instructions. Please be in mind that the claimed speeds may not be accessible immediately. The Starlink system may take up to 12 hours to attain peak functionality after the installation process. During this time, system downloads the most recent drivers, scans and maps satellites in the area around the dish. And calculates the best positions for communicating with the various satellites above. You shouldn't have to worry about constantly modifying your configuration because these connections adjust automatically.
The Wi-Fi signal had a startling range in its initial use. Spanning my entire five-bedroom house and much of the yard.
After I've had an opportunity to try the Starlink internet service for a few months. I'll write a thorough review, so stay tuned. In the interim, read our evaluation of T-5G Mobile's Home Internet service. Which is another alternative to cable and fiber that may be available in your area.