How To Disable Windows Defender In Windows 11 Permanently. Windows Defender is the built-in antivirus and antimalware software that comes pre-installed with Windows operating systems. It provides real-time protection against various types of threats, including viruses, malware, spyware, ransomware, and other malicious software.
Windows Defender continuously monitors your computer’s files, applications, and network activity to detect and block potential threats. It includes several components and features designed to safeguard your system, such as:
In Windows 11, disabling Windows Defender permanently not recommended, as it provides essential security features to protect your computer from malware and other threats.
Table of Contents
How To Disable Windows Defender In Windows 11 Permanently
However, if you have a specific reason to disable it temporarily, you can follow these steps:
- Click on the “Start” button or press the Windows key on your keyboard to open the Start menu.
- In the Start menu, click on the gear icon to open the Settings app.
- In the Settings app, click on “Privacy & security.“
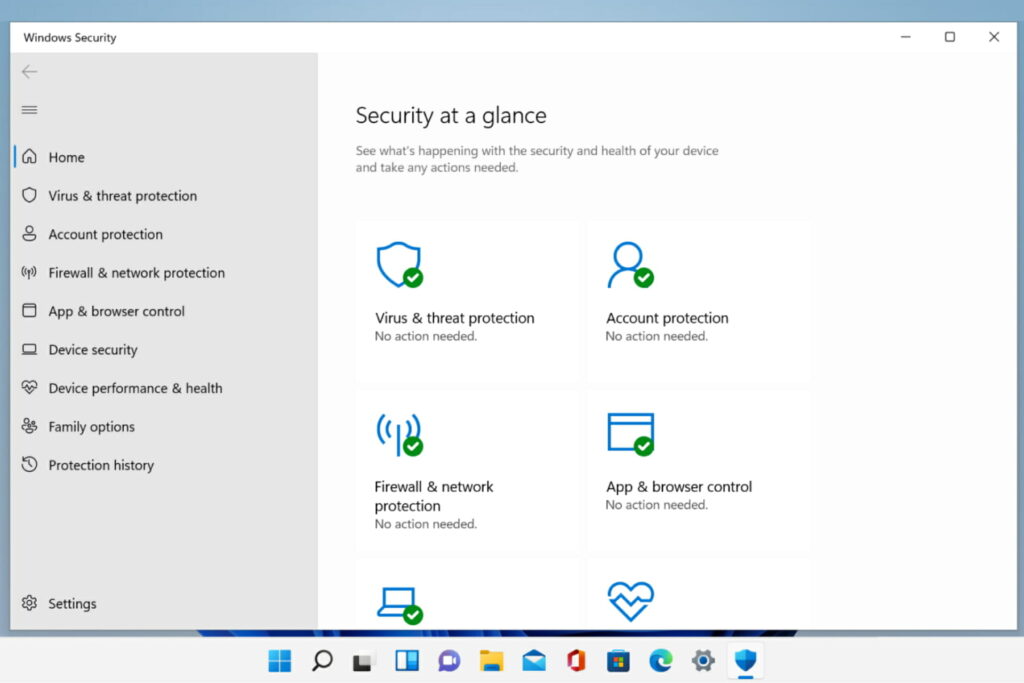
- In the left sidebar, select “Windows Security.”
- In the Windows Security settings, click on the “Virus & threat protection” option.
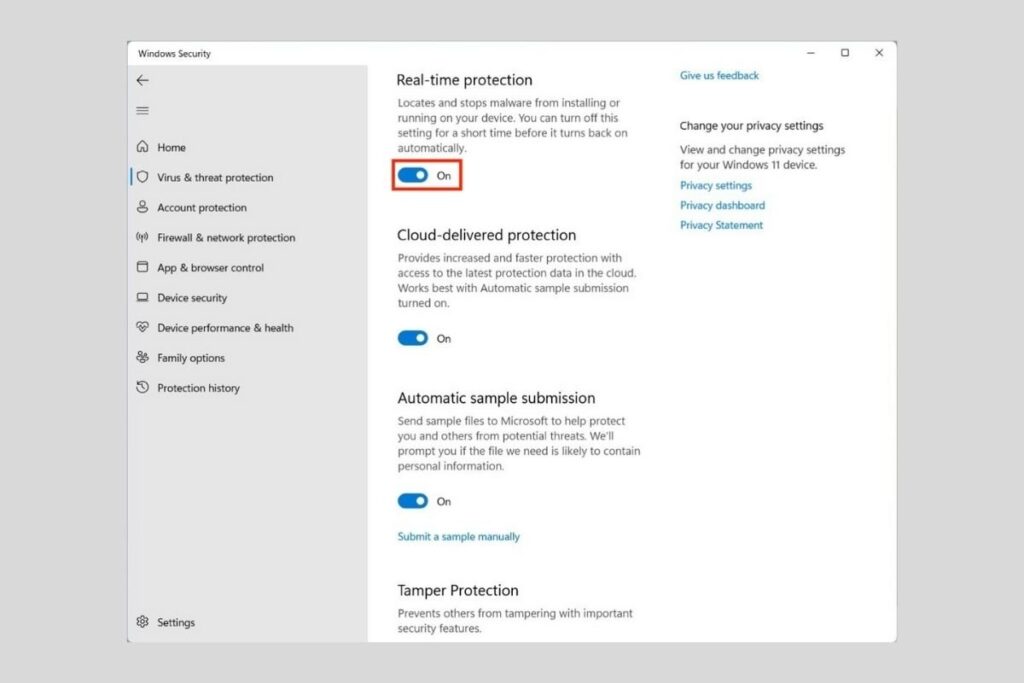
- Under the Virus & threat protection settings, click on the “Manage settings” link.
- In the Real-time protection section, toggle the switch to turn off “Real-time protection” This will disable Windows Defender temporarily.
Keep in mind that disabling Windows Defender leaves your computer more vulnerable to security risks. It’s important to have an alternative antivirus solution installed and running if you choose to disable Windows Defender.
If you looking for more advanced configurations or want to permanently disable Windows Defender, it recommended to consult Microsoft official documentation or seek assistance from a knowledgeable IT professional to ensure that your computer remains adequately protected.
Learn More: How To Get PHR Certification
Features
- Real-time Protection: Windows Defender runs in the background, scanning files, programs, and downloads in real-time. It actively detects and blocks threats as they encountered.
- Malware Detection and Removal: Windows Defender employs sophisticated detection algorithms to identify and remove malicious software from your computer. It automatically quarantines or removes detected threats to prevent them from causing harm.
- Firewall Integration: Windows Defender integrates with the Windows Firewall to provide an additional layer of protection against unauthorized network access and potential threats from the internet.
- Browser Protection: Windows Defender includes browser extensions, such as Microsoft Defender SmartScreen, which helps protect you from malicious websites, phishing attempts, and unsafe downloads.
- Offline Scanning: Windows Defender offers the ability to perform offline scans, which useful in cases where your system not connected to the internet or when a thorough scan needed outside of the normal operating environment.
Windows Defender designed to be lightweight, efficient, and user-friendly, offering a basic level of protection for your computer. However, depending on your security needs and preferences, you may choose to complement it with additional antivirus software or security suites for enhanced protection.
It’s important to keep Windows Defender up to date by regularly installing Windows updates, as these often include security patches and improvements to the software’s detection capabilities.
FAQ
How To Disable Windows Defender In Windows 11 Permanently?
- Click on the “Start” button or press the Windows key on your keyboard to open the Start menu.
- In the Start menu, click on the gear icon to open the Settings app.
- In the Settings app, click on “Privacy & security.“
- In the left sidebar, select “Windows Security.”
- In the Windows Security settings, click on the “Virus & threat protection” option.
- Under the Virus & threat protection settings, click on the “Manage settings” link.
- In the Real-time protection section, toggle the switch to turn off “Real-time protection” This will disable Windows Defender temporarily.