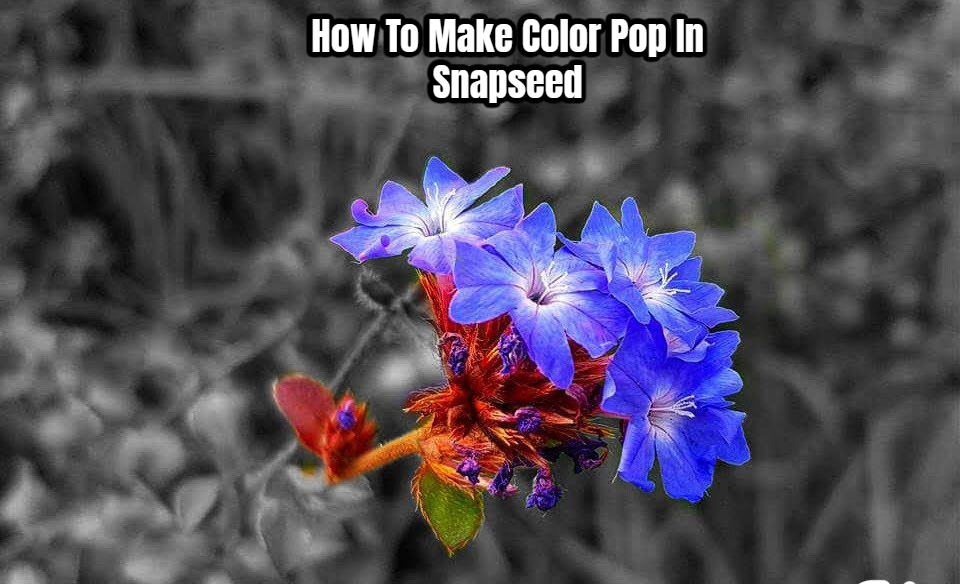
How To Make Color Pop In Snapseed. Image editing has received a lot of attention, with effects such as portrait mode, ultrawide photo, and zoom mode gaining a lot of traction on social media. The majority of people choose Adobe Photoshop for creating professional-looking photographs, however not everyone has access to Photoshop. There are millions of smartphone-optimized apps available that may meet a user’s every demand. Today, we’ll show you how to produce colour pop graphics on any photo in a quick lesson.
Color Pop graphics are captivating and often utilised. The chosen topic is coloured, but the remainder of the image is black and white. While both Samsung and Google have this functionality built-in, we’ve chosen Google’s Snapseed software to demonstrate how to do it. To make your photos stand out, scroll down.
How To Do Color Pop In Snapseed
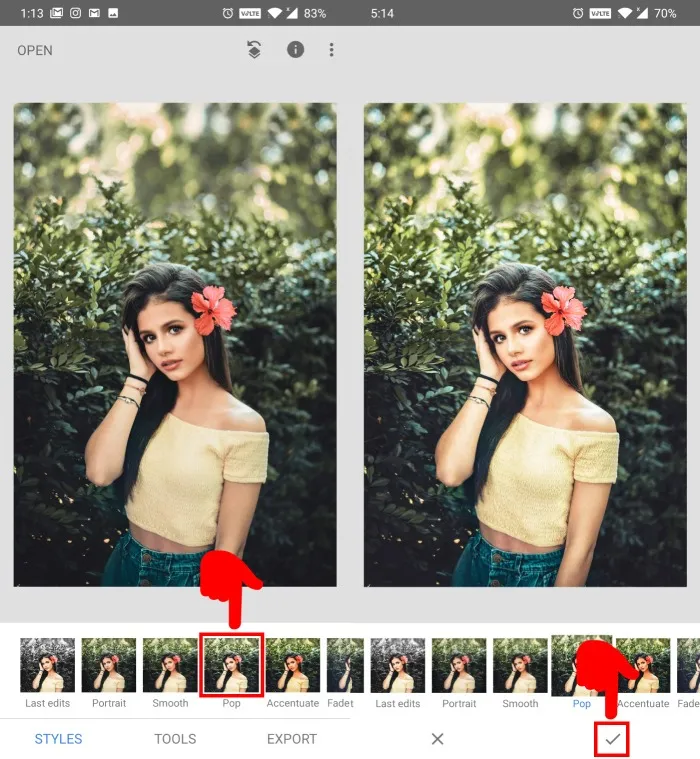
STEP 1: Launch Snapseed and choose an image to work with. Below the image, you’ll find a list of effects. To give your shot a saturated tint, choose Pop or Accentuate (This step is optional). Then, on the white tick mark, click.
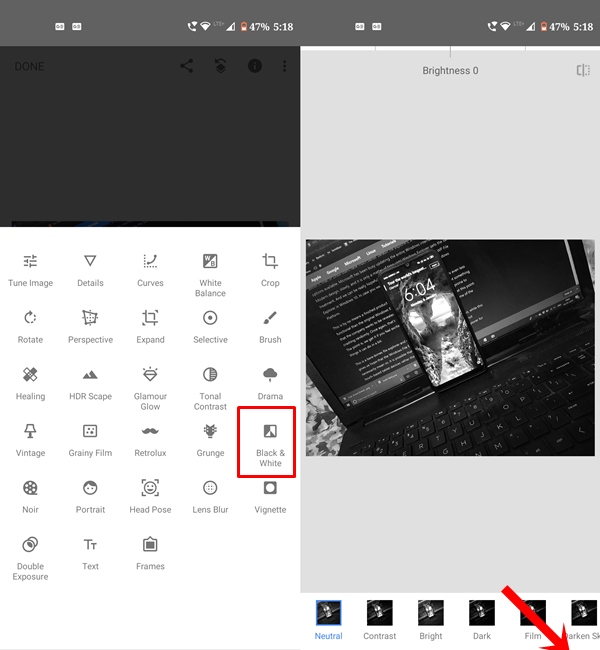
STEP 2: Next, go to Tools and select Black and White from the drop-down menu. Tick the Tick Mark box and select Neutral. You can also use Contrast, Bright, and other choices.
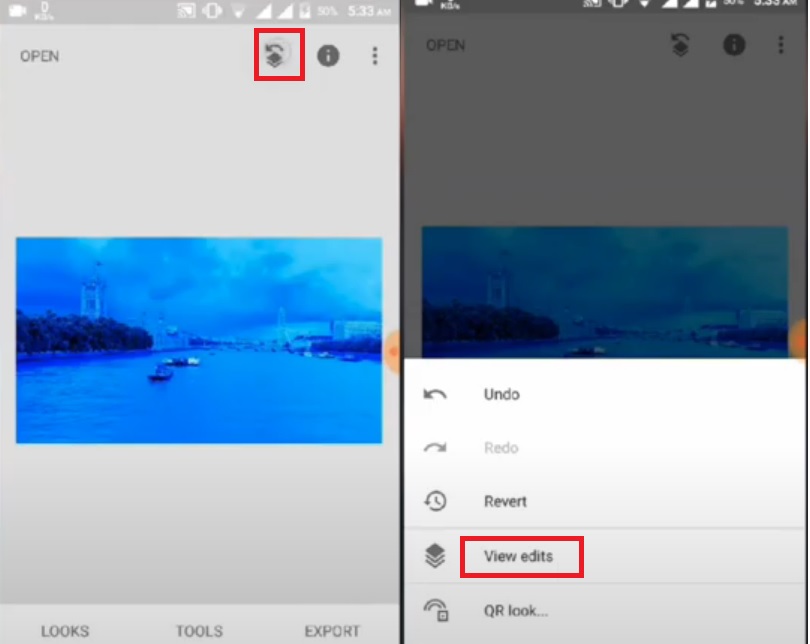
STEP 3: Next to the information icon(i), you’ll notice the Undo symbol. If you tap the Undo icon, other alternatives will appear. You must choose View edits from the options presented.
STEP 4: After selecting View edits, go to Black & White and then to Stacks Brush, which is next to the delete or centre icon (refer image if there is confusion).
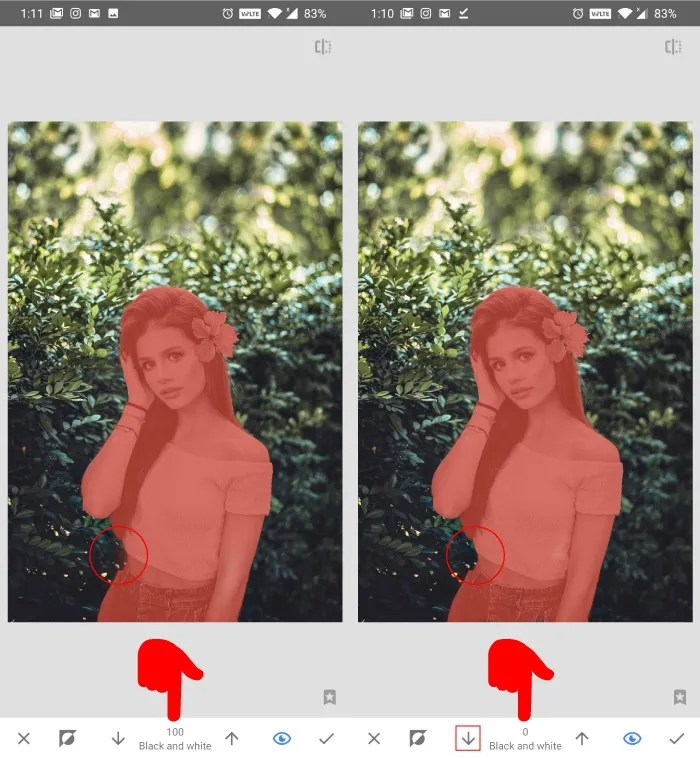
STEP 5: At the bottom of the page, there’s another Black and White option with arrows to change the brush size.
Select the topic by clicking on it. A crimson colour will appear on the subject. This determines which part of the image will have a colour pop. Select the borders with care.
To avoid any mistakes, you can also zoom in. For delicate subjects like hair, zoom in too close. Although there is no eraser symbol, the errors can be erased by reducing the brush size to zero.
STEP 6: Once you’ve made your selection, click the inversion tool, which is located next to the cancel option. This allows you to see a sample of your output. Don’t apply the colour to the subject in invert mode; instead, fix your background.
Select the mask (eye-shaped) option to see an accurate representation of your output. Tap the back arrow and the tick mark.
Choose between Share, Save, Export, and Export as when you click Export.
Keep in mind that the above procedure is a little puzzling, so if the outcomes aren’t flawless, you’ll have to attempt again. Snapseed also lacks an eraser shortcut and the UI can be perplexing at times, but these flaws are worth overlooking because the outcome is faultless.